Forms in Chat: Technical Integration Guide
Overview
Forms in Chat is a powerful feature designed to capture visitor data in a structured and visually appealing manner during an active chat session. This tool enables operators to collect information effectively and display it within the web console as part of a lead form. Additionally, it serves various purposes, including:
- Conducting surveys.
- Booking appointments with date and time selection.
- Enhancing user interactions with intuitive elements like date pickers, sliders, email/phone fields, and more.
Purpose
The primary purpose of Forms in Chat is to create a seamless and engaging experience for visitors. For instance, during a car-buying journey, visitors can easily fill out forms shared by operators, enabling smooth data capture.
How Forms in Chat Works
1. Setting up a Form
Forms are configured through the New Business Web (FCP) portal. Operators can access and manage forms created on this platform.
Steps to Configure a Form
- Log in: Access the New Business Web at https://service11.carchat24.com/app.
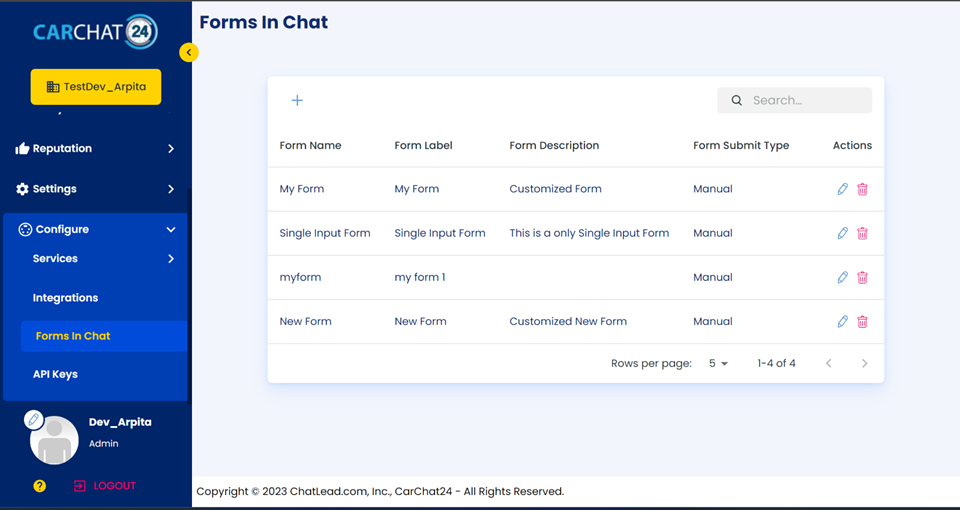
- Navigate to Forms in Chat: Under the Configure section, click the "Forms in Chat" option to view, edit, add, or delete forms.
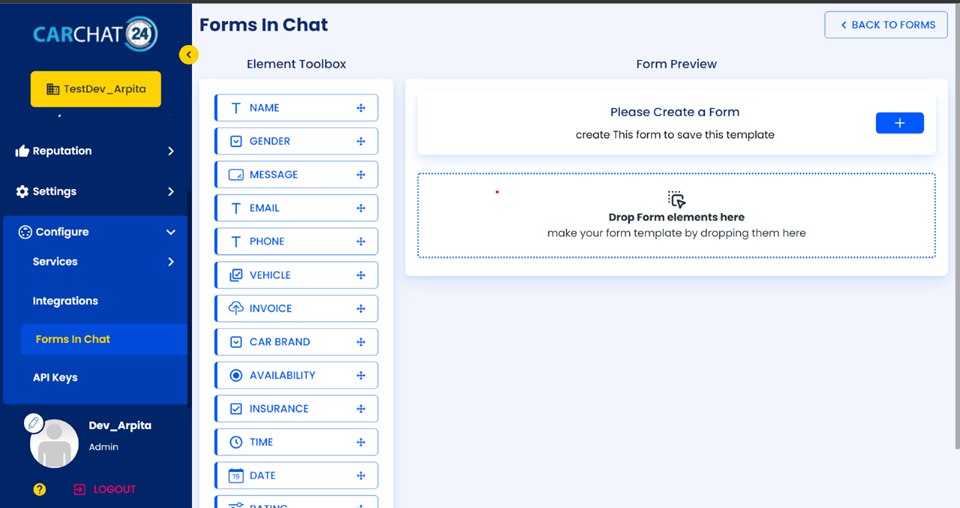
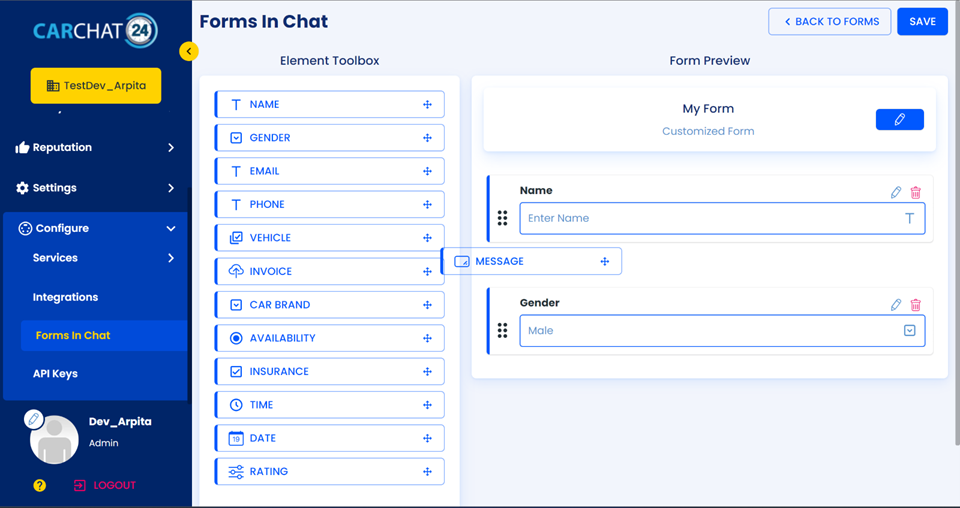
- Design the Form:
- Use a drag-and-drop interface to add elements such as text boxes, date pickers, time pickers, sliders, image uploaders, checkboxes, and radio buttons.
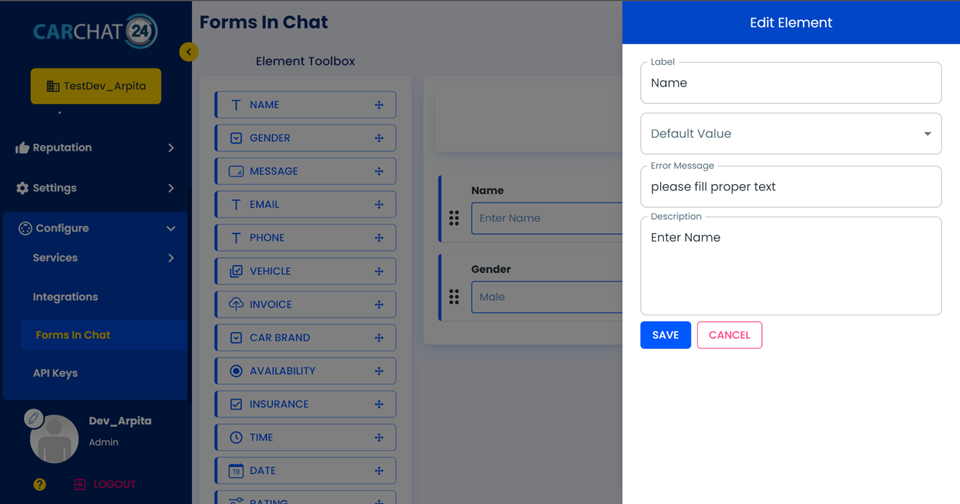
- Configure placeholders, labels, and other properties for each element.
- For pre-chat data auto-population, ensure that form labels match the pre-chat data keys. This will auto-fill matching fields with pre-chat values as defaults.
 .
.
 .
.
 .
.
 .
.
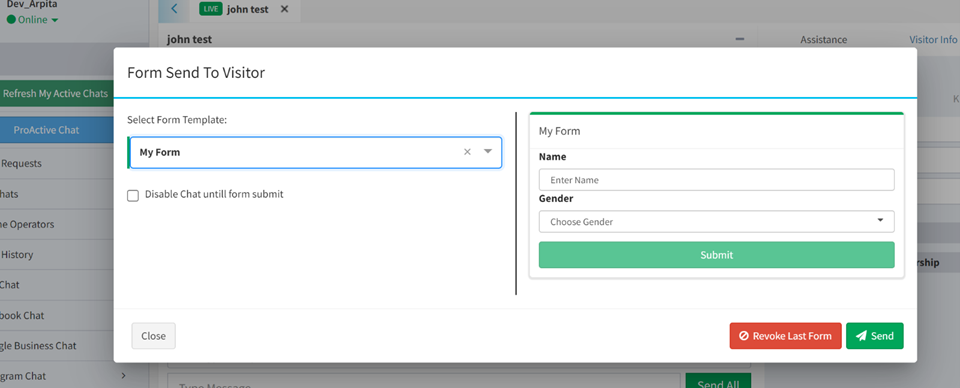
2. Operator Actions in the Web Console
Once forms are configured, operators can interact with them through the Web Console:
- Send Forms: Select and send a pre-configured form to the visitor during an active chat session.
- Revoke Forms: Revoke the last sent form if needed.
- Disable Text Input: Use a checkbox to disable the chat text box until the visitor completes and submits the form.
- Preview Forms: View a dummy version of the selected form to verify its appearance and behavior.
 .
.
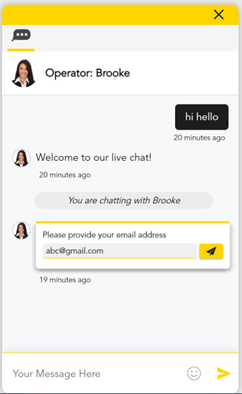
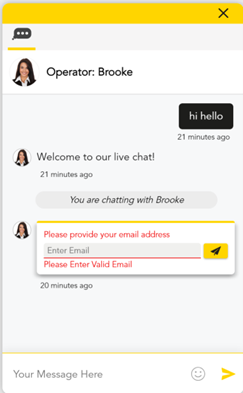
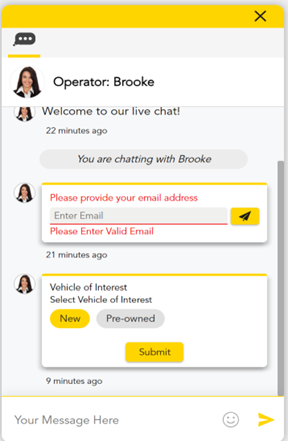
3. Visitor Interaction in the Chat Window
When an operator sends a form:
- The visitor sees the form rendered in the chat window.
- The visitor can complete and submit the form directly within the chat.
- Submitted data is displayed in the web console as a structured table and auto-populated into the lead form fields (e.g., phone, email).
 .
.  .
. .
.
Key Features
1. Pre-chat Data Auto-population
- Pre-chat data keys can be used to auto-populate matching form fields.
- Ensure that form labels align with pre-chat keys for accurate auto-filling.
Steps to Enable Auto-population:
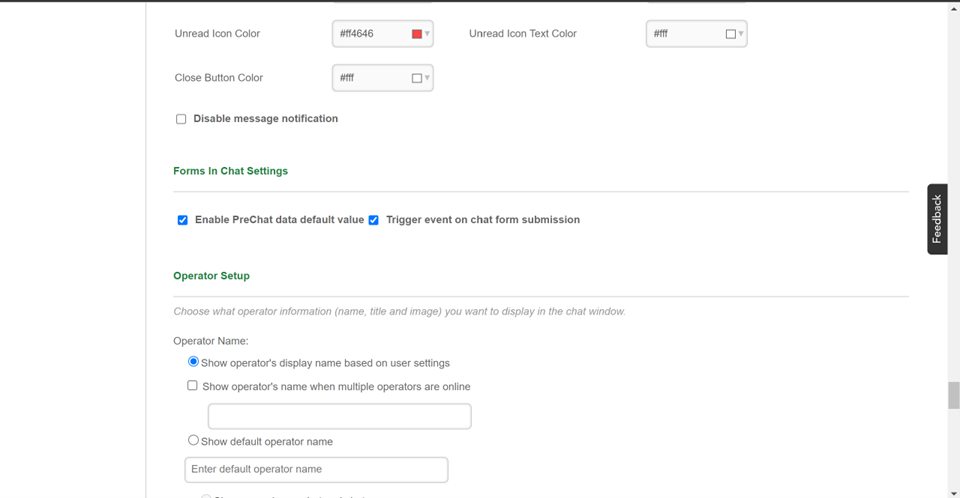
- Navigate to Web Integration > Specific Chat Window Settings in https://service11.carchat24.com/.
- Enable the "Enable PreChat Data Default Value" checkbox in settings.
2. Event Trigger on Form Submission
- When a visitor submits a form, an event is triggered with all captured data.
- Enable the "Trigger Event on Chat Form Submission" checkbox in settings to activate this feature.
 .
.
Technical Notes
-
Platform Requirements:
- Access to the New Business Web (FCP) portal for form configuration.
- Web console access for operators to send and manage forms.
-
Customization Options:
- Wide range of form elements: text boxes, date/time pickers, sliders, image uploads, and more.
- Label and placeholder customization for intuitive user experience.
-
Integration Considerations:
- Ensure that pre-chat keys are configured correctly to utilize auto-population features.
- Forms are rendered dynamically based on operator selection during the chat.
For further assistance or advanced customization, please contact our support team.