Chat window & Webconsole Deployment
Author(s)
- Sayan Mukherjee
Servers and specifications:
-
Test Server - for testing and development purpose
-
Live Server - for live deployment and database purpose.
-
Db Server - for database purpose and static domains used for static assests like (media, images etc).
Product and Domains:
-
Live Carchat24
- Main Website: Click here
- Old Business Web: Click here
- New Business Web: Click here
- Web Console: Click here
-
Live RvChat
- Main Website: Click here
- Old Business Web: Click here
- New Business Web: Click here
- Web Console: Click here
-
Live BoatChat
- Main Website: Click here
- Old Business Web: Click here
- New Business Web: Click here
- Web Console: Click here
-
Live LegalChat
- Main Website: Click here
- Old Business Web: Click here
- New Business Web: Click here
- Web Console: Click here
-
Live ServicesPro
- Main Website: Click here
- Old Business Web: Click here
- New Business Web: Click here
- Web Console: Click here
-
Test
- Old Business Web: Click here
- New Business Web: Click here
- Web Console: Click here
How to access server
-
Connect to the sophos vpn 1st after connection successfully established.
-
goto rdc(Remote Desktop Server) by windows search.
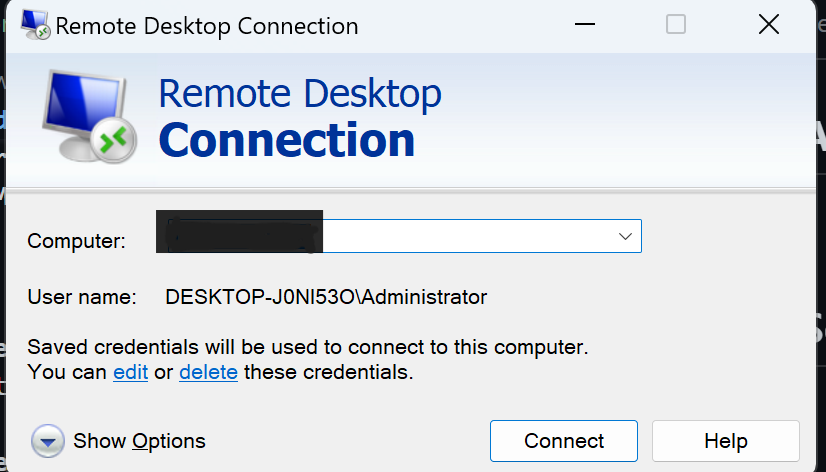
-
enter your server IP and username and password then enter connect and click on yes to connect the specified server.
How to make InpageChat publish in local:
-
goto Development\VisitorChatAngular\InpageChat in your localdisk.
-
open in visual studio and build it.
npm run build
-
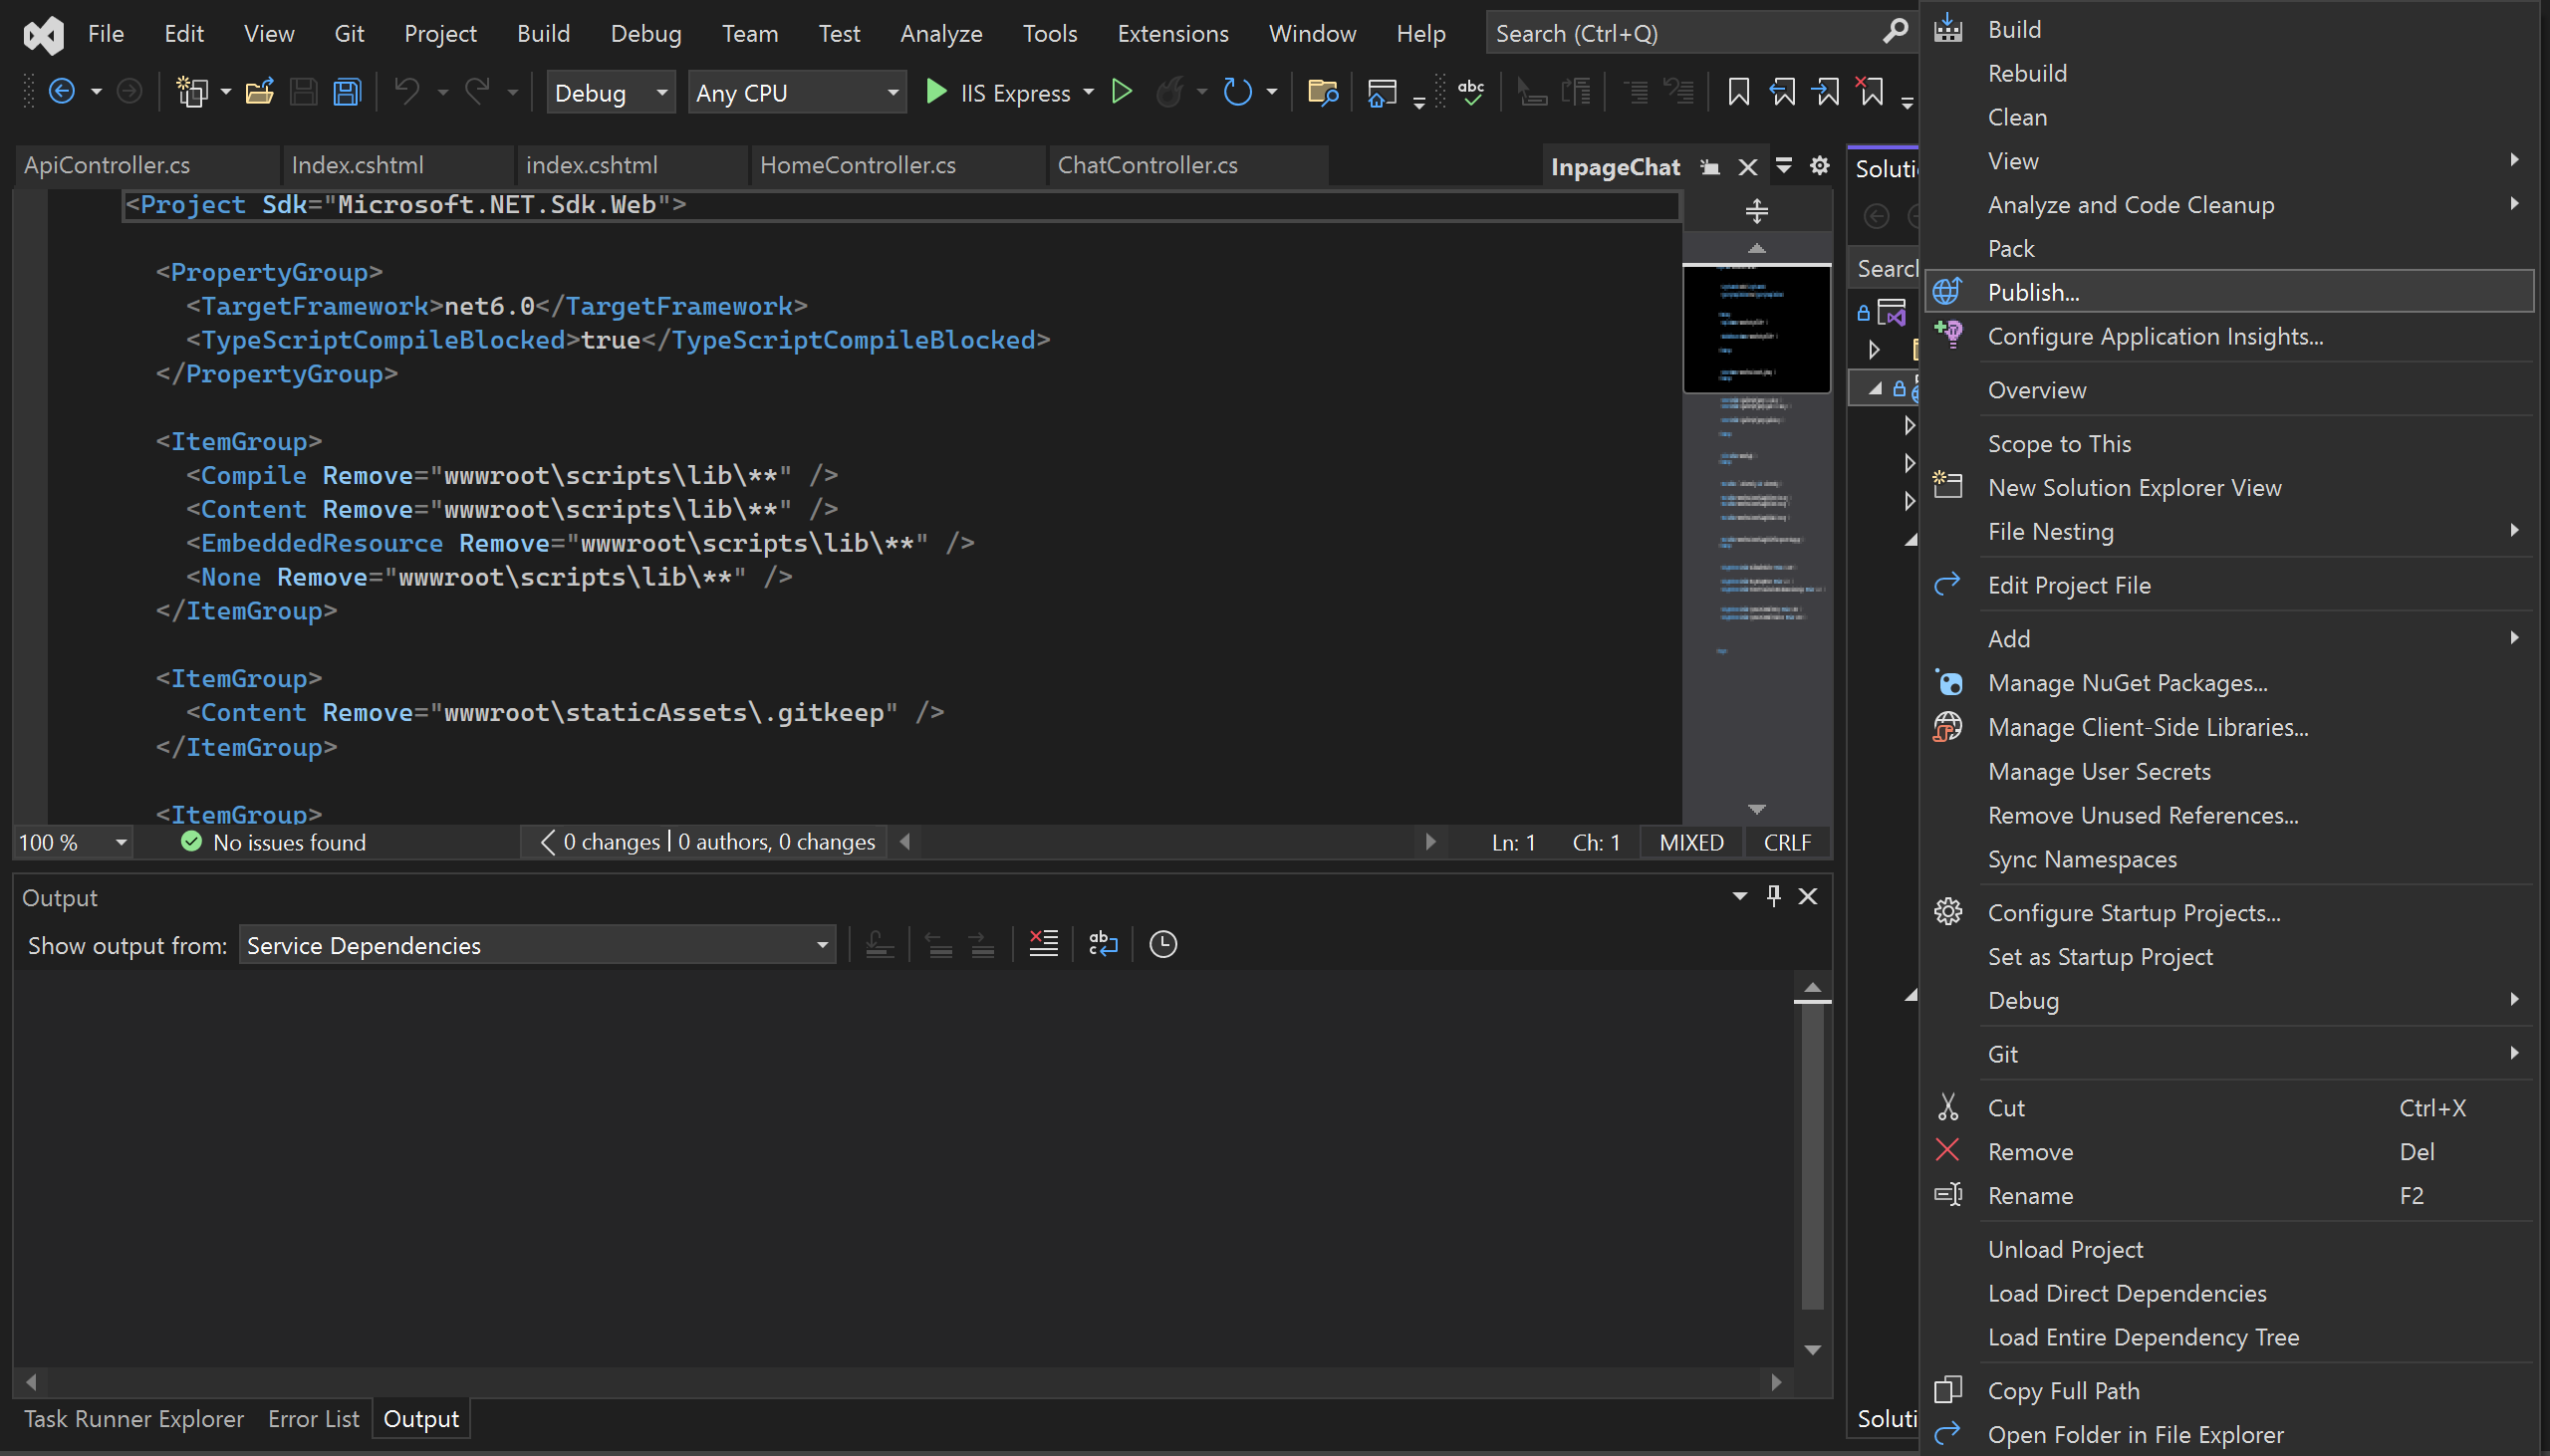
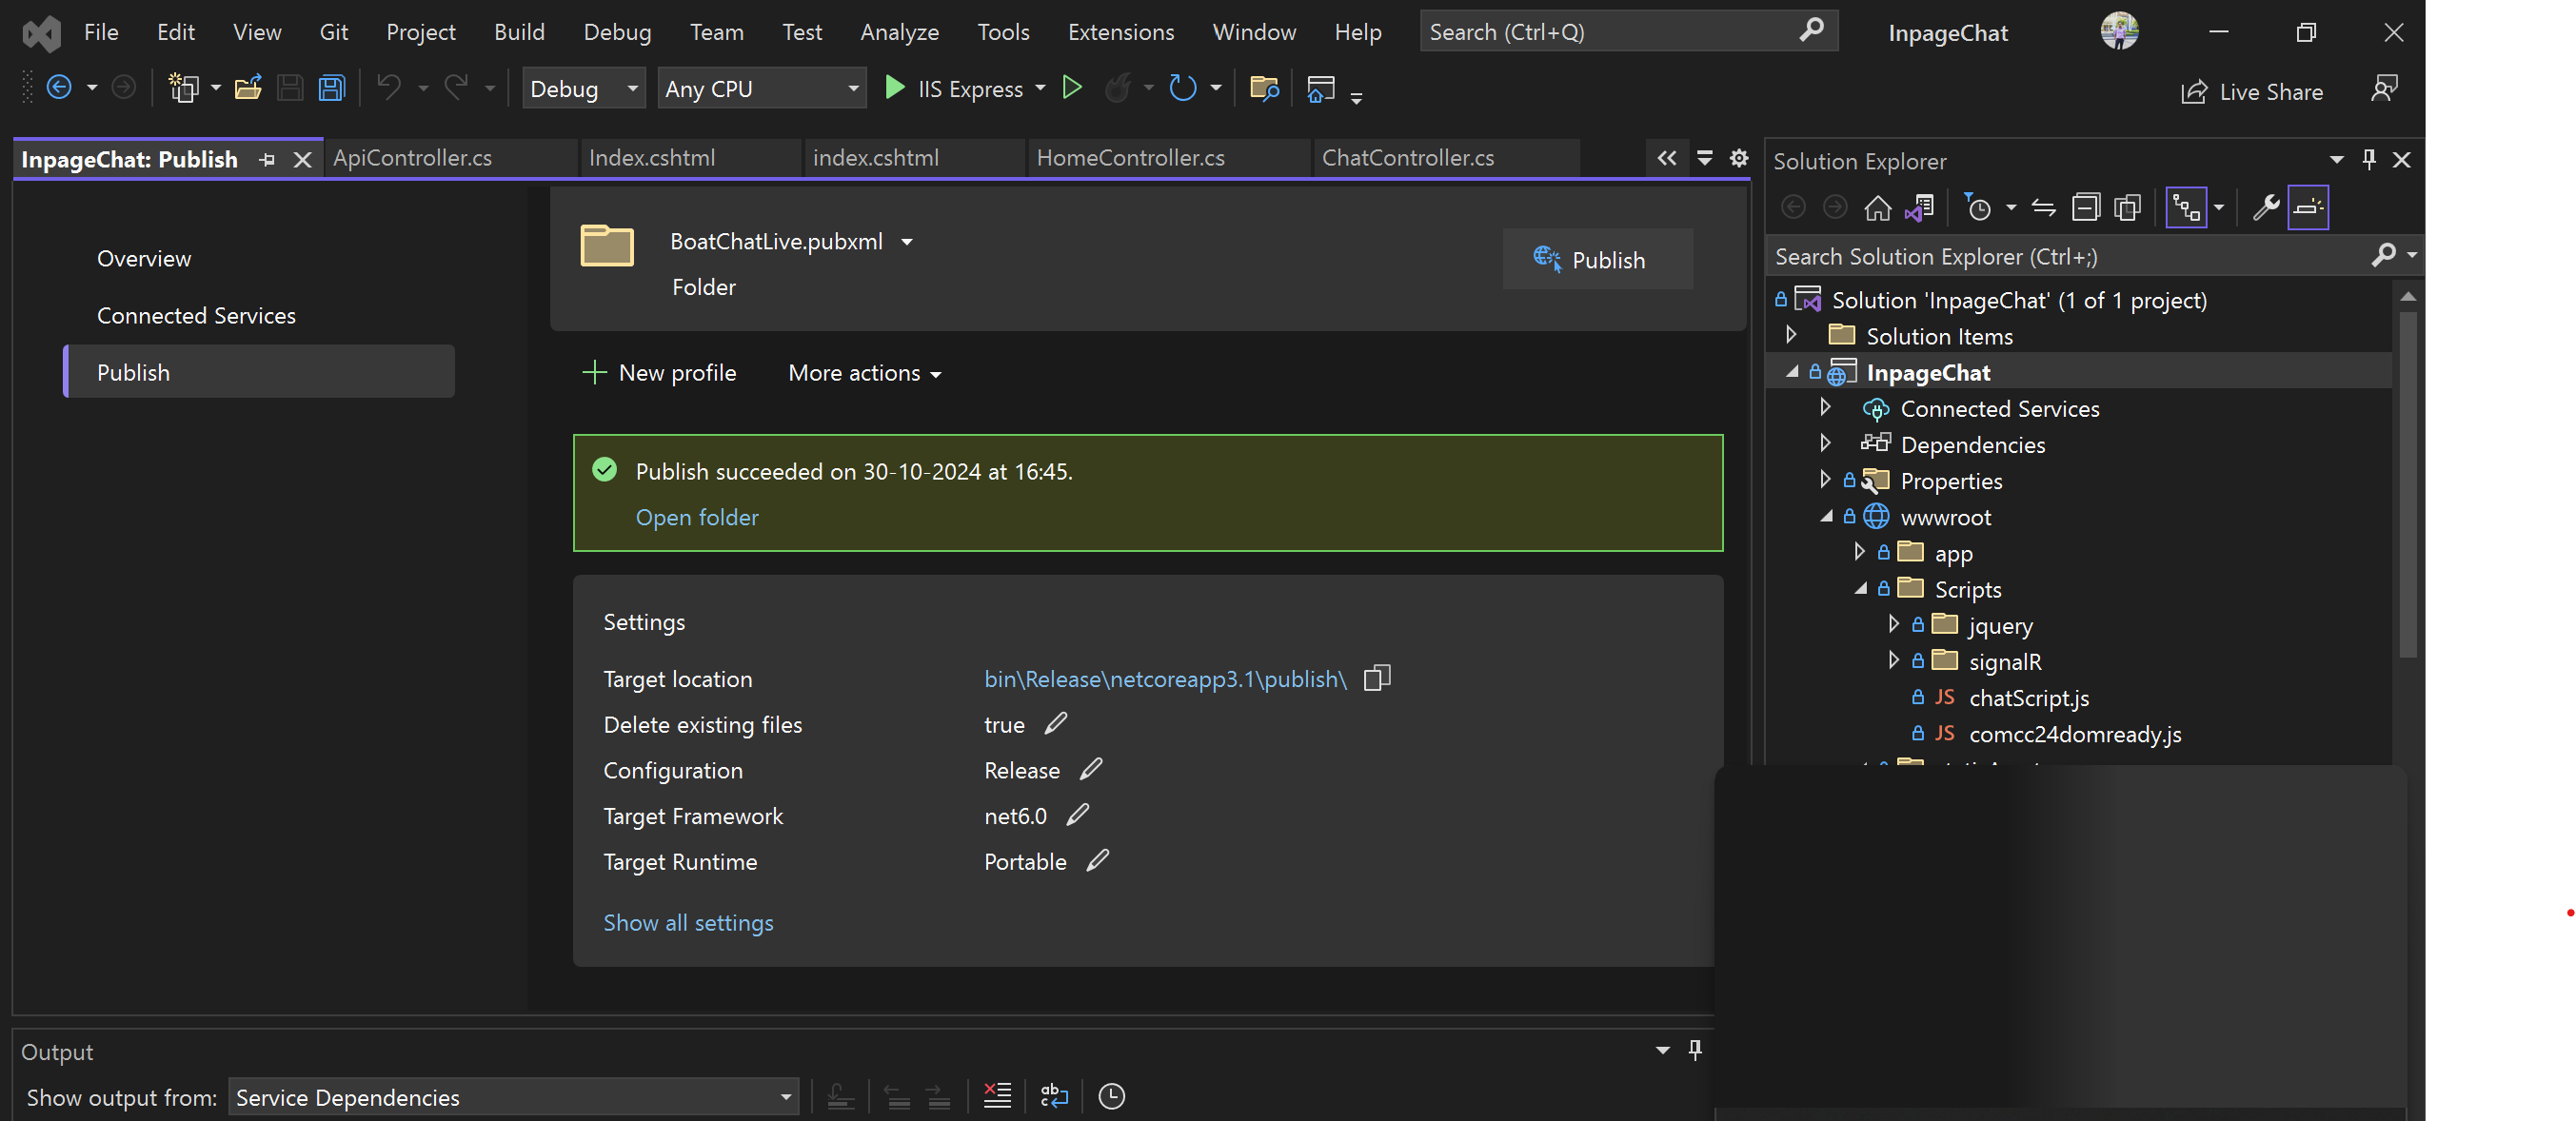
after build complete open InpageChat.sin file in visual Studio. and right click on InpageChat folder in solution explorer. and click publish.
 .
. -
and then select configuration for which server you want to publish.
 for an example:
carChat24Live.pubxml is for carchat live server publish.
for an example:
carChat24Live.pubxml is for carchat live server publish.
All config with Test mentioned in prefix are test build which will only publish to test server not live. Only Live config build can be publish to live server.
after selecting config and options click on publish.
-
after completion of publish. click on open folder.
 .
. -
Then select all files except web.config and NLog.config then compress others file and create a .zip file.
How to make InpageChat publish in Azure Pipeline:
-
goto Azure Dev Portal.
-
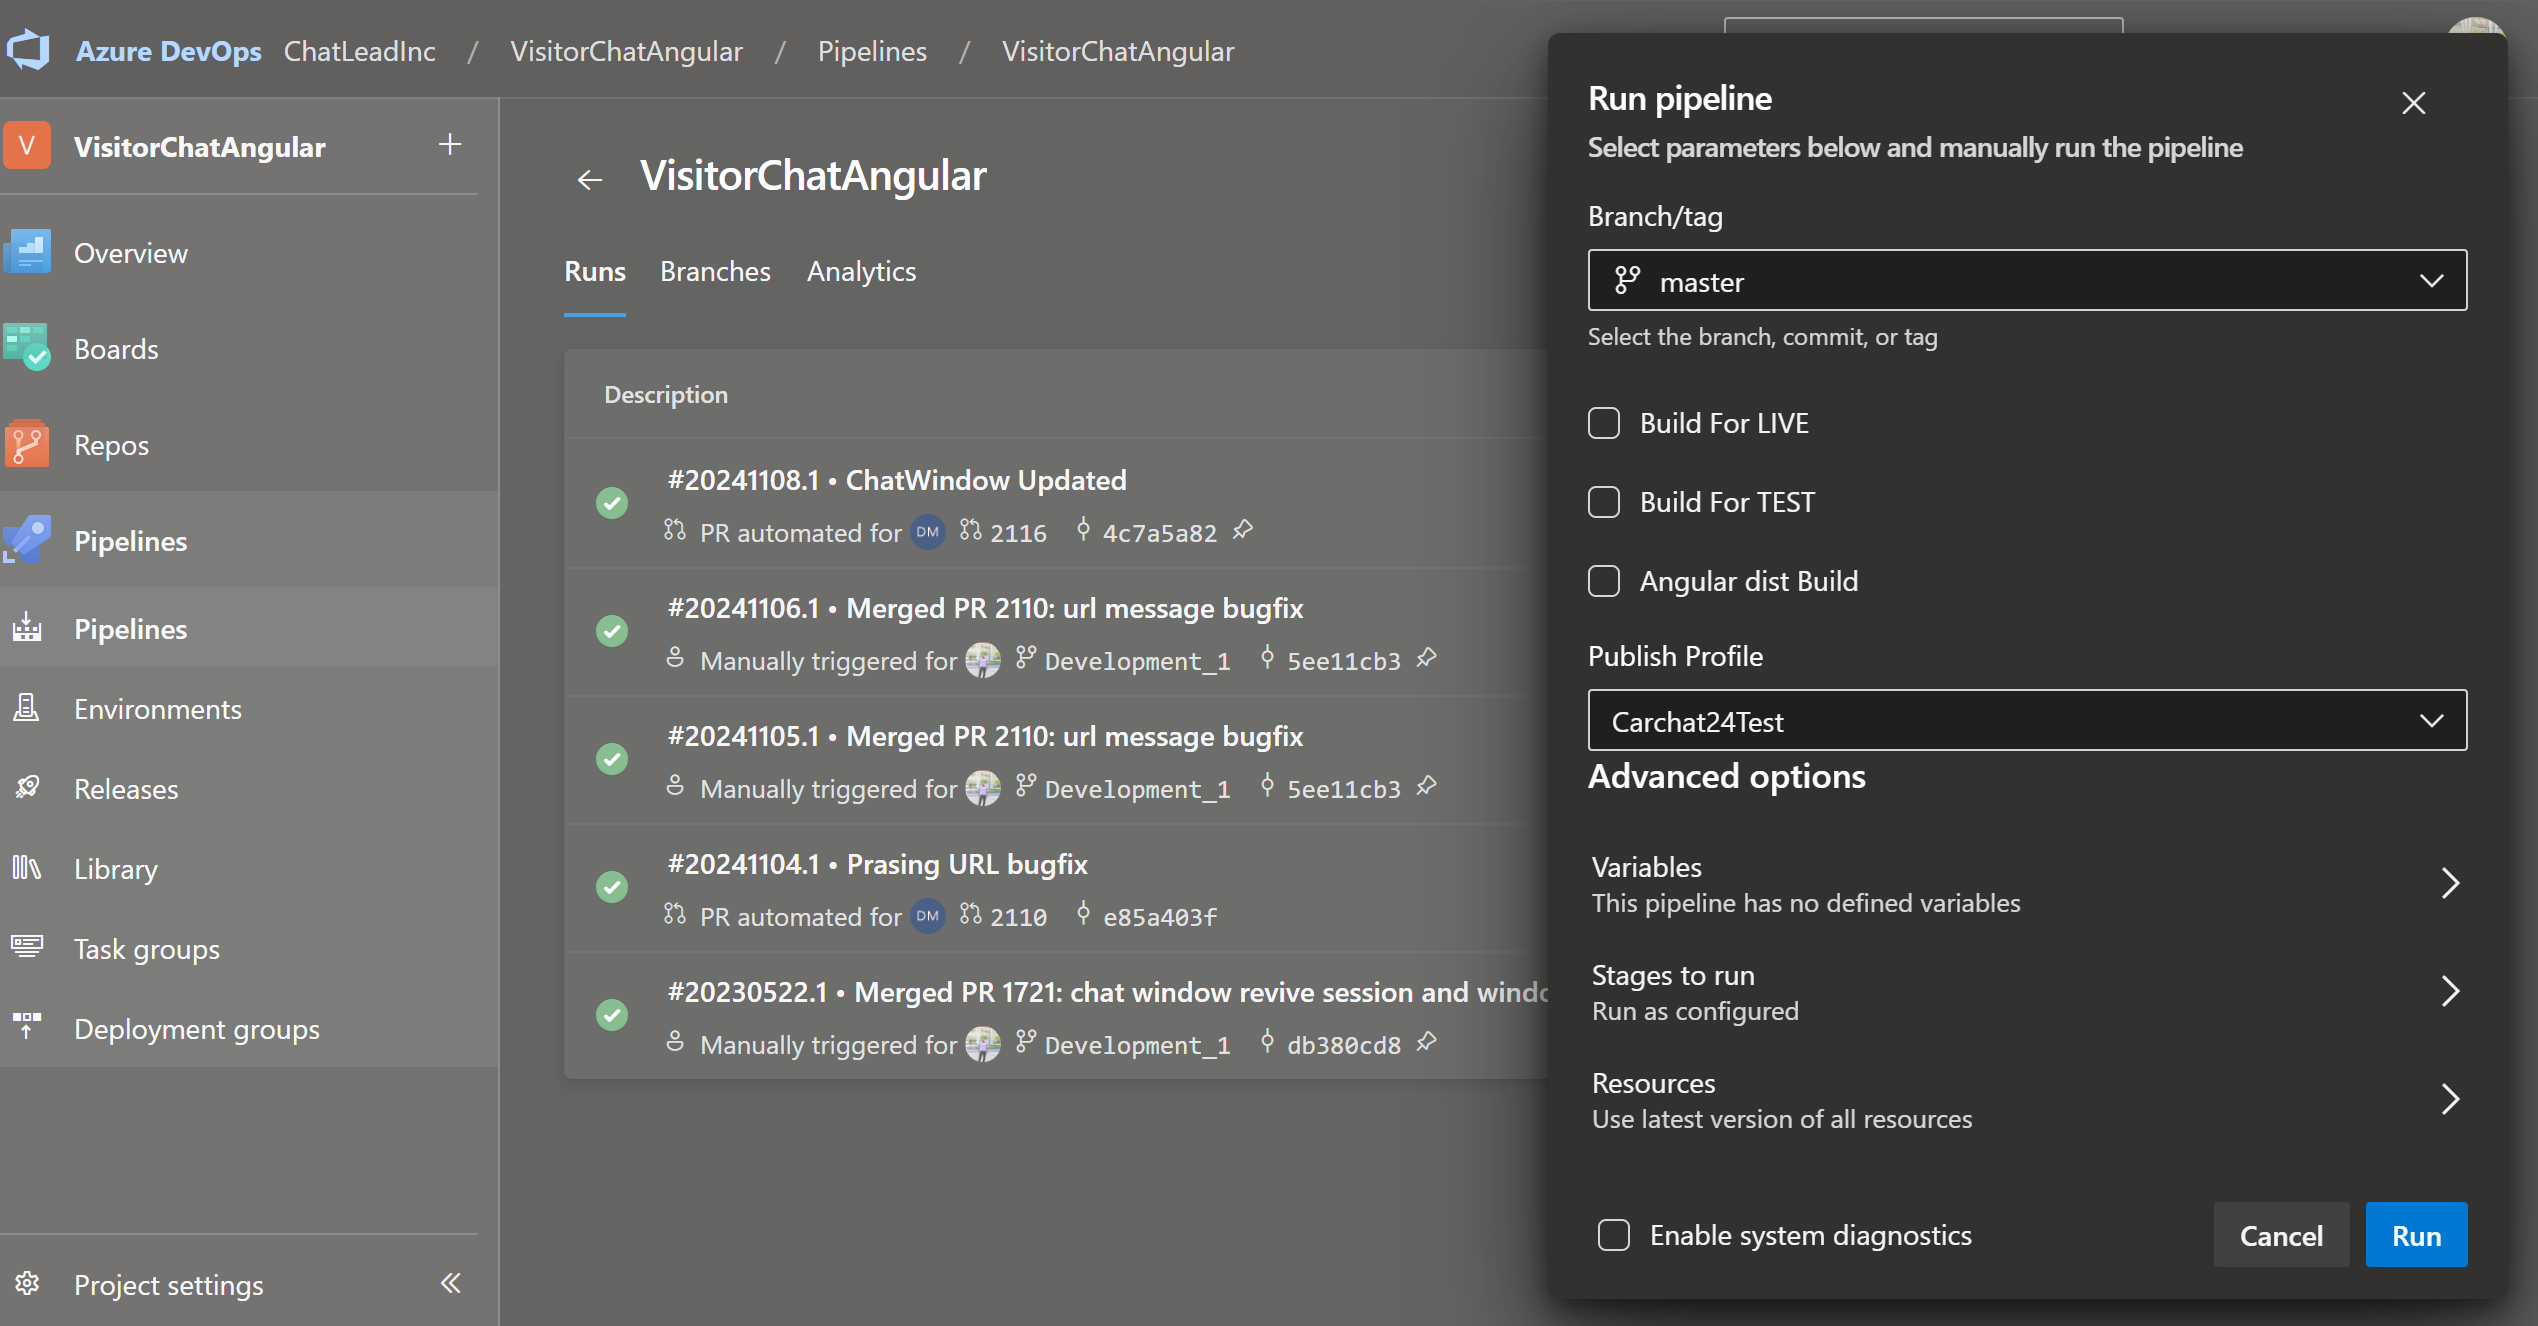
goto VisitorChatAngular project and goto pipeline click on VisitorChatAngular and Run Pipeline
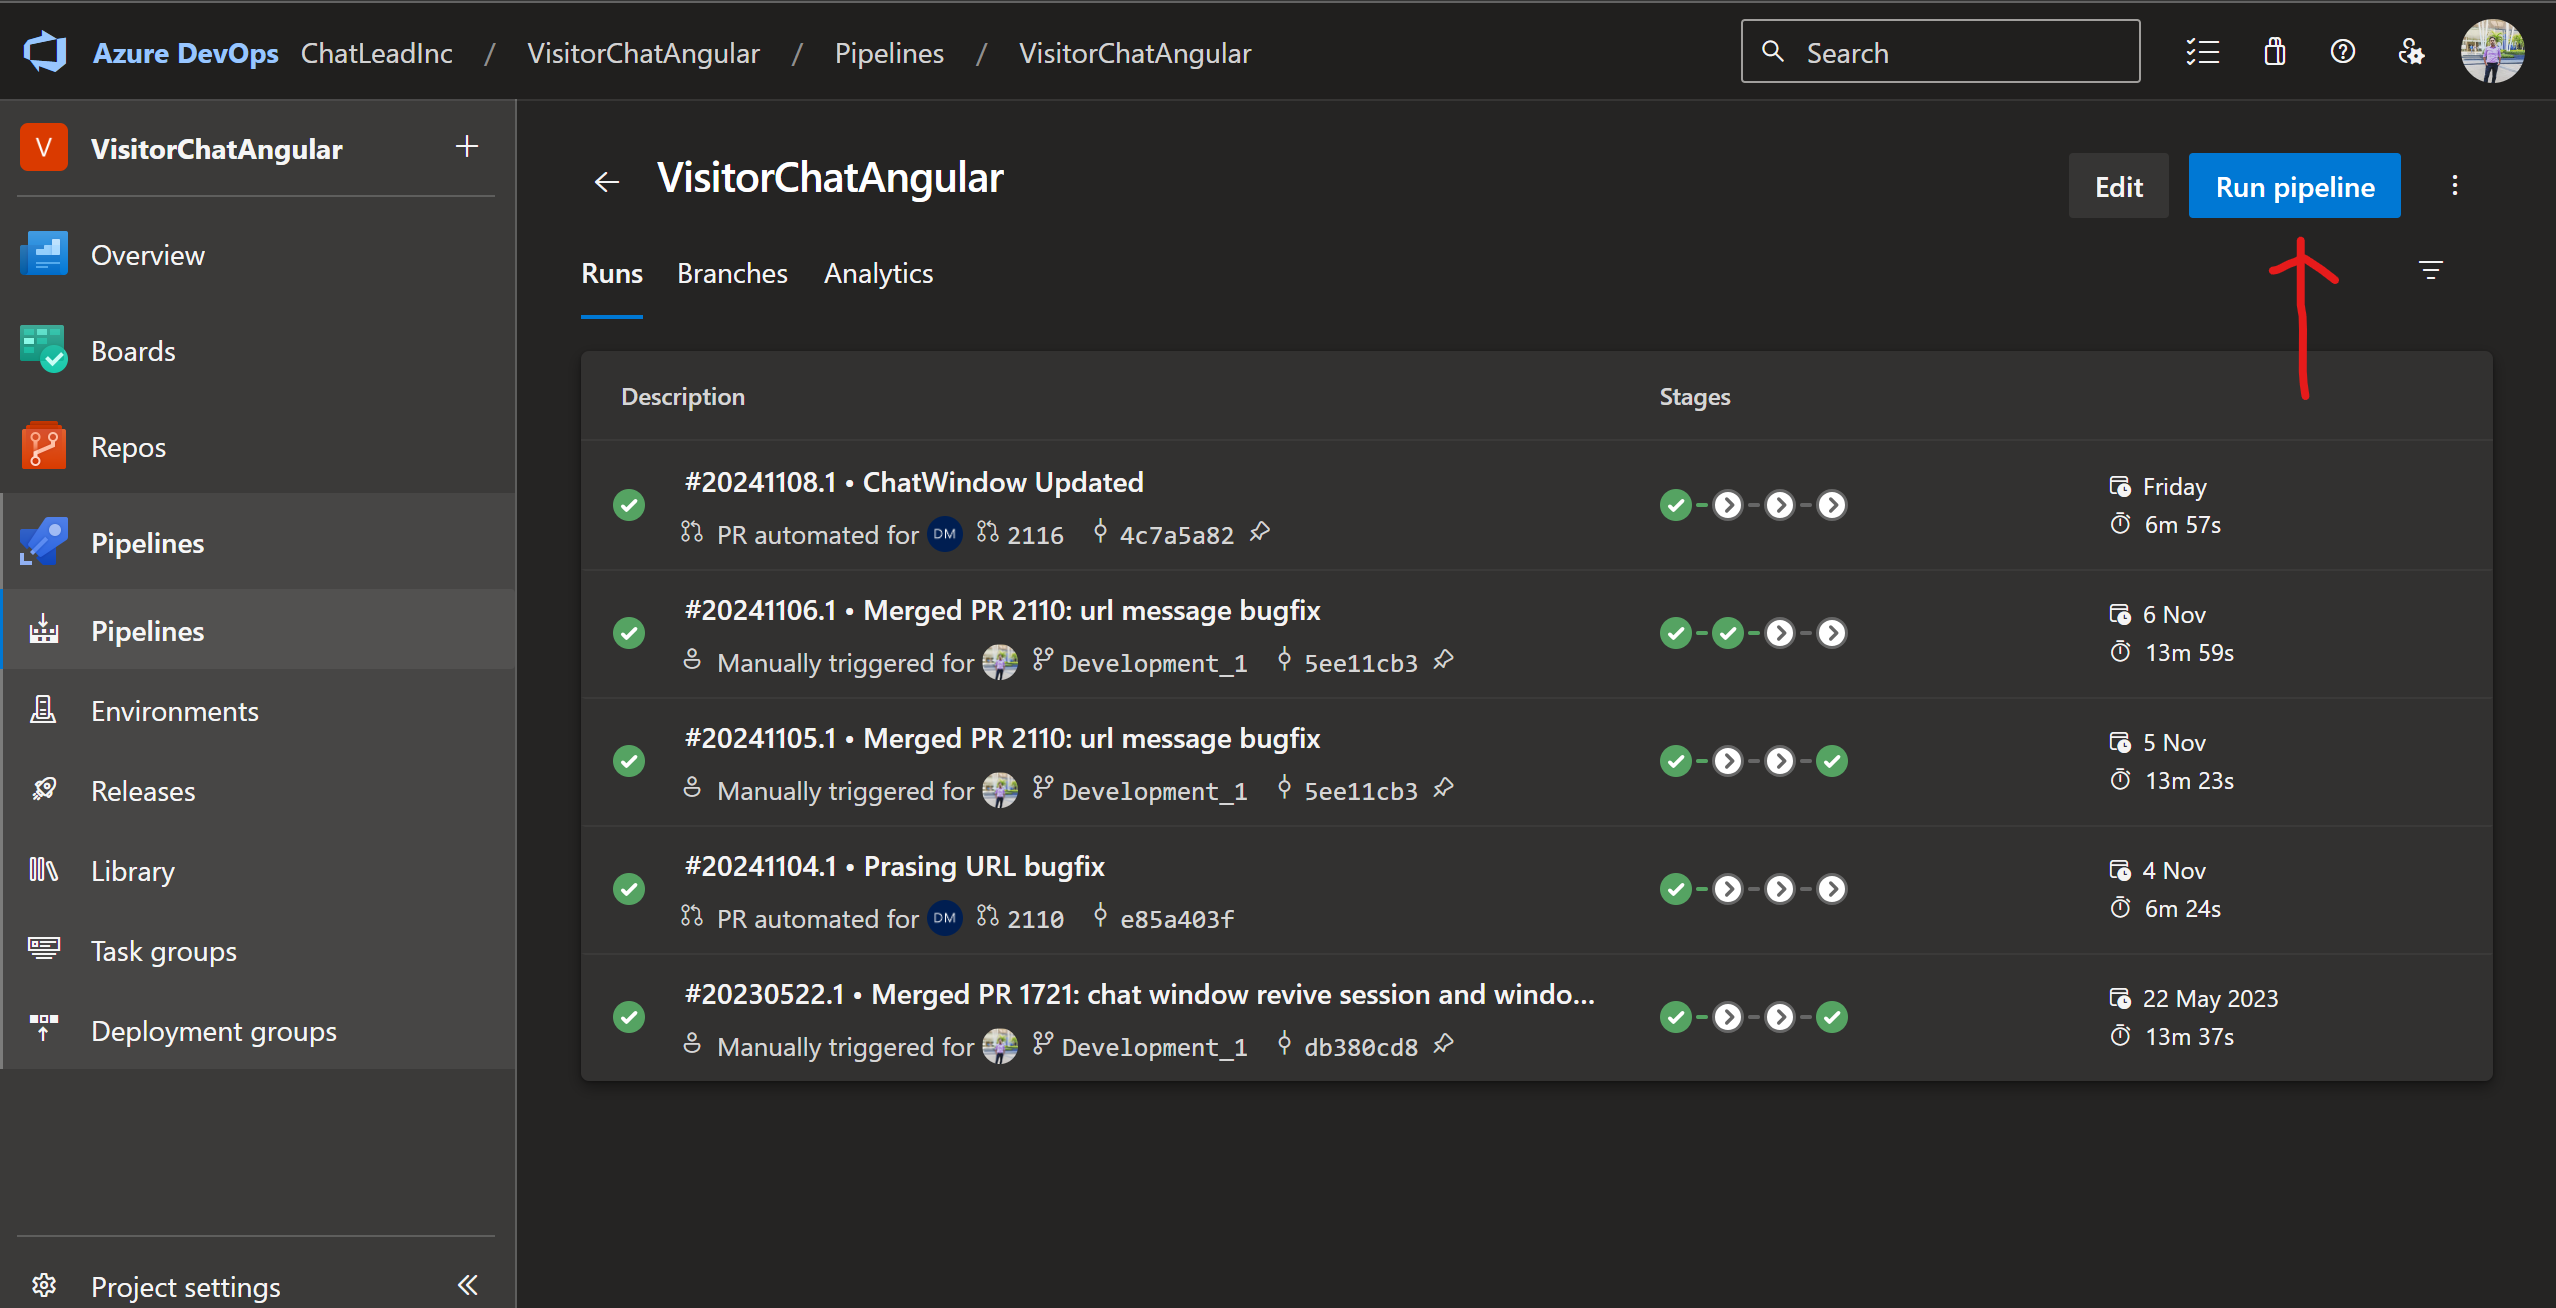 .click on run pipeline
-
select branch which branch you want to build
-
Build For LIVE - building for live.
-
Build For TEST - building for test enviornment
-
Angular dist Build - for only angular dist build
-
select publish profile for which product you want to publish.
-
after running that artifact is generated download that zip upload it without web.config, NLog.config file to dedicated server.
-
Test Server Deployment of VisitorChatAngular
-
Now connect sophos and take to that specific server.
-
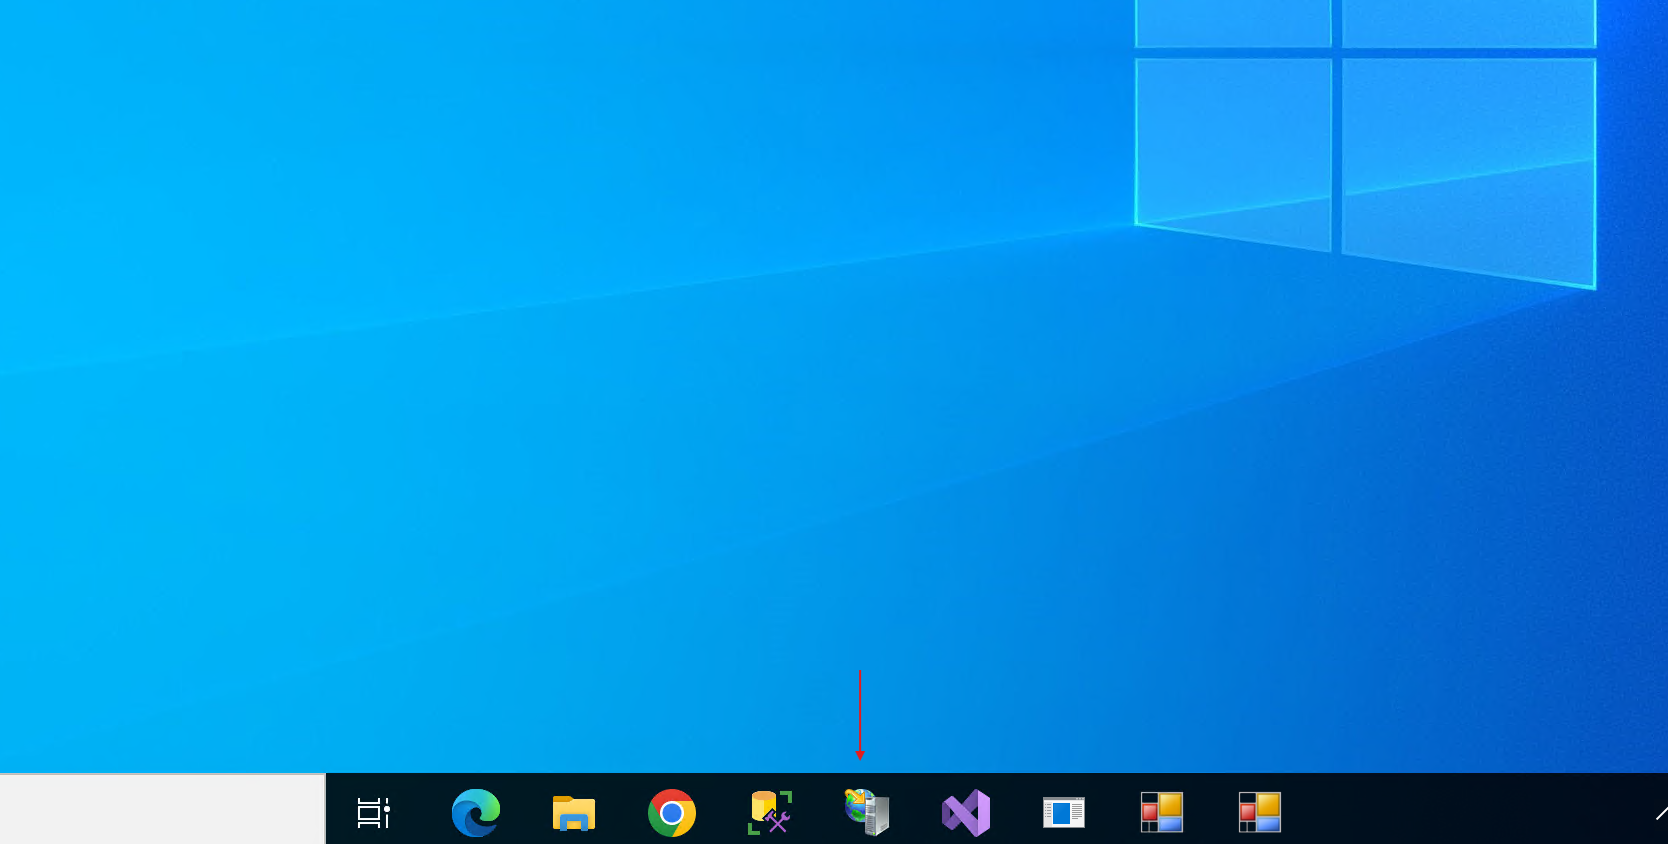
Click on that IIS (internet Information Service) icon on the taskbar.
-
in that iis tab all the registered domain are there click on left side arrow in that service11carchat24test.chatlead.com and the right click on that InpageChat folder and the click on explore.
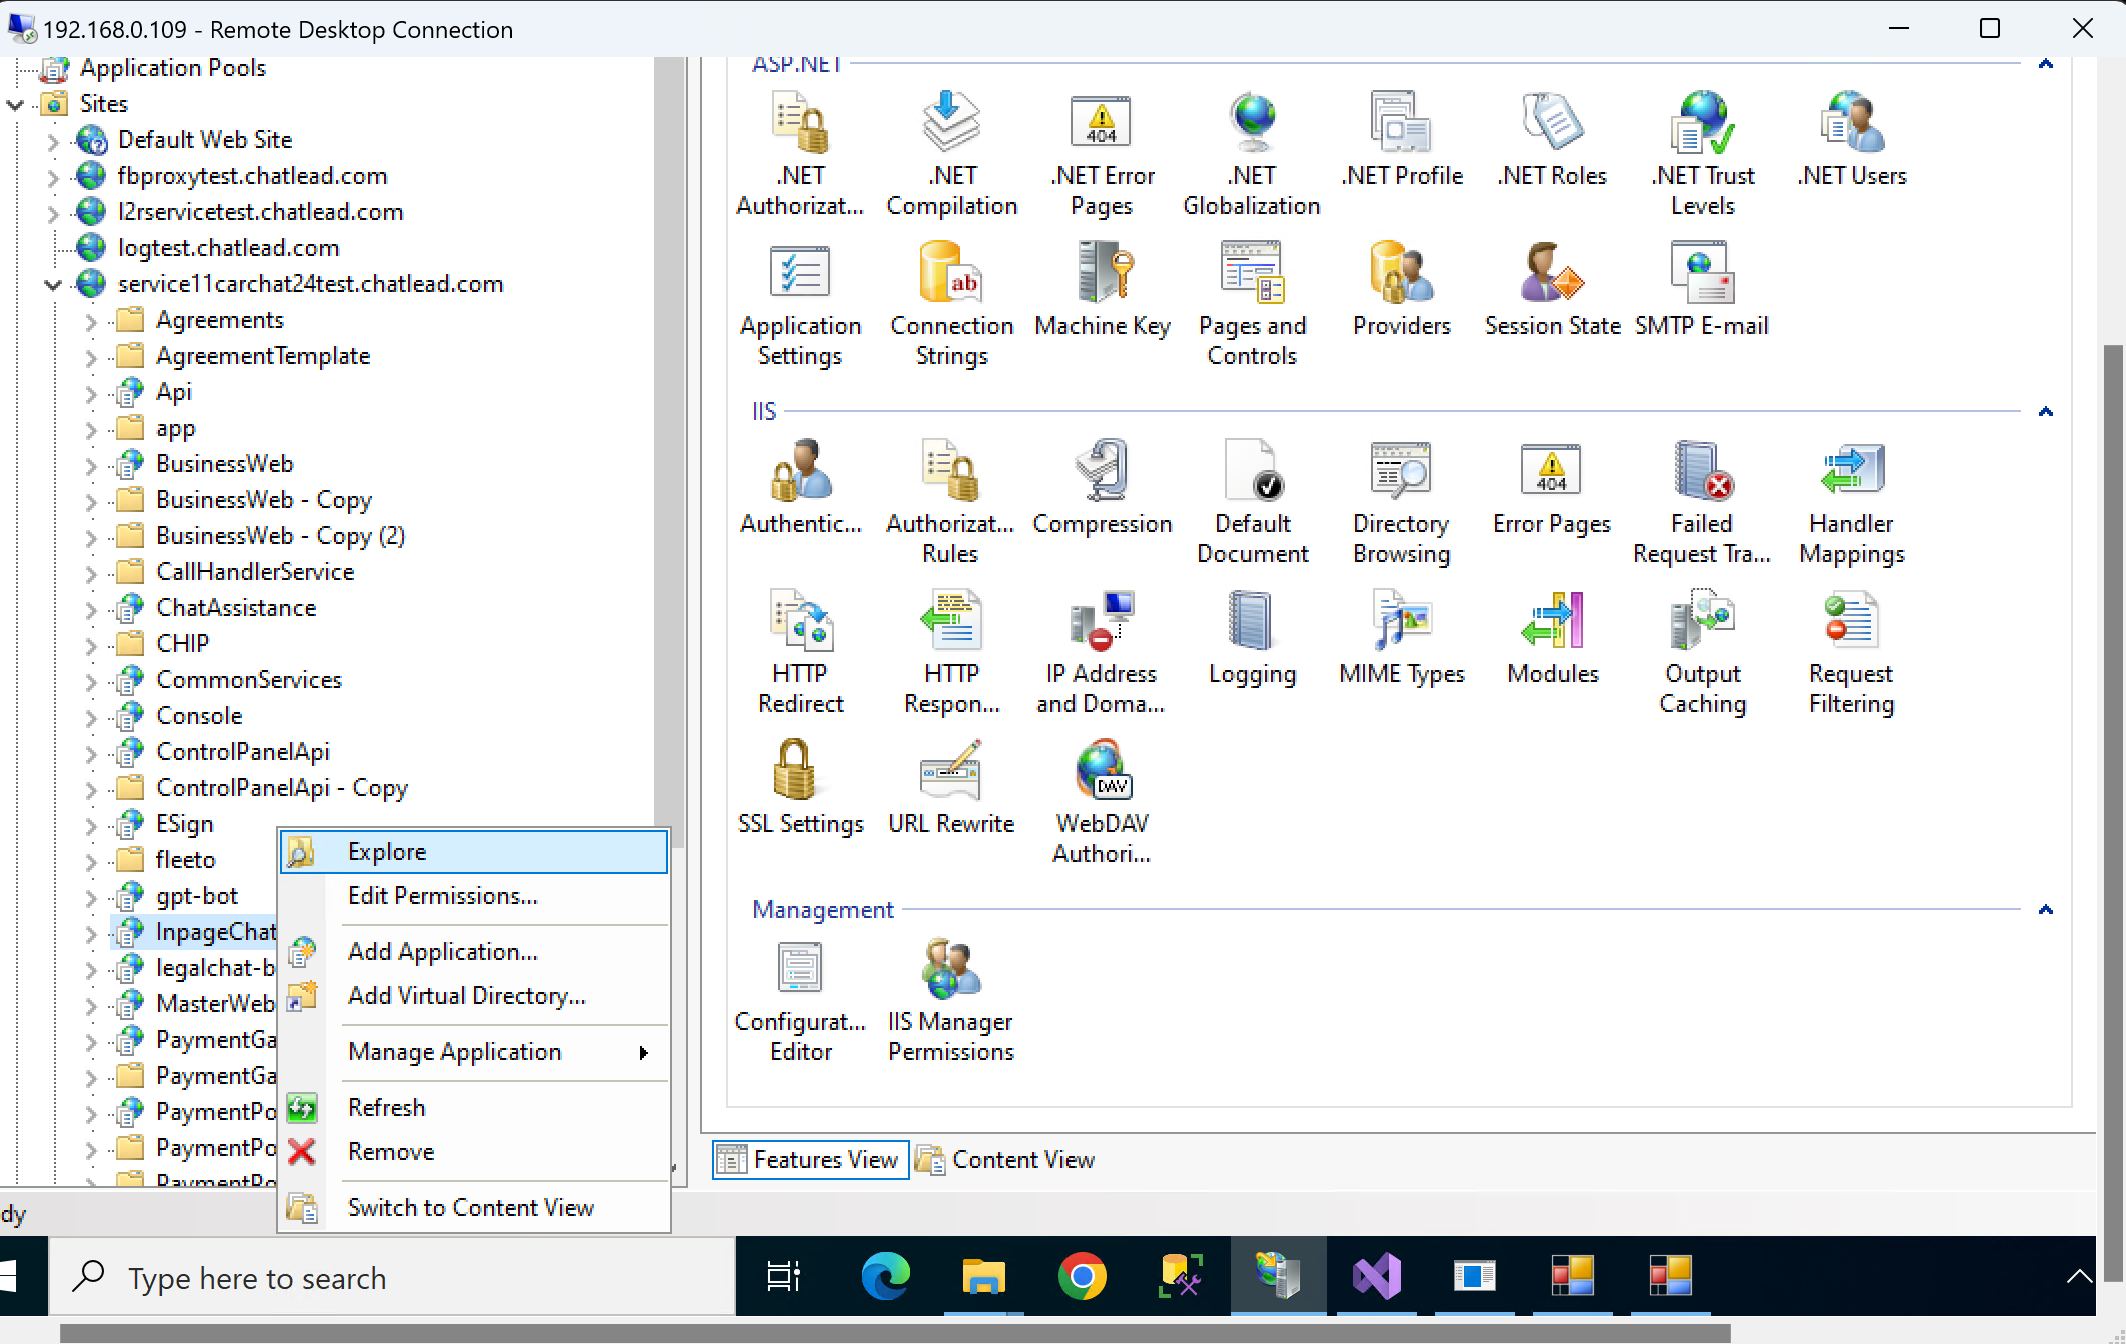 .
. -
Then select all files( please delete all the existing .zip files before selecting all file.) and then compress all the file to .zip file and name it backup_inpagechat.zip. and paste it on C:\Development\Backup\InpageChat.
-
Create a folder with a current date. for an example if date is 13th november 2024 then it will be 13_11_2024. and paste the backup.
-
and move back to that C:\Development\Runtime\Carchat24\Publish\Service\InpageChat(Inpagechat publish folder).
-
copy your local build zip file and paste it on that server's folder. and the keep only two zip files, web.config, NLog.config and delete other files(if some files are not deleted then keep the application pool stop/create a same name folder and rename and delete existing one.C:\Development\Runtime\Carchat24\Publish\Service ) after that unzip copied zip file and start application pool and your changes are live.
-
For Only Angular Deployment :
-
goto Development\VisitorChatAngular\InpageChat in your localdisk.
-
open in visual studio and build it.
npm run build -
goto wwwroot\app\dist\d3 and select all and zip it.
-
after that goto test server and open IIS and goto service11carchat24test.chatlead.com and InpageChat folder.
-
then goto wwwroot\app\dist\d3 that folder and take rest of elements backup and upload it to that folder on server and unzip the zip
or
-
-
Make it from azure pipeline. and download that.
-
-
Live Server Deployment of VisitorChatAngular
-
Now connect sophos and take to that specific server.
-
buld as per live product build as per need.
-
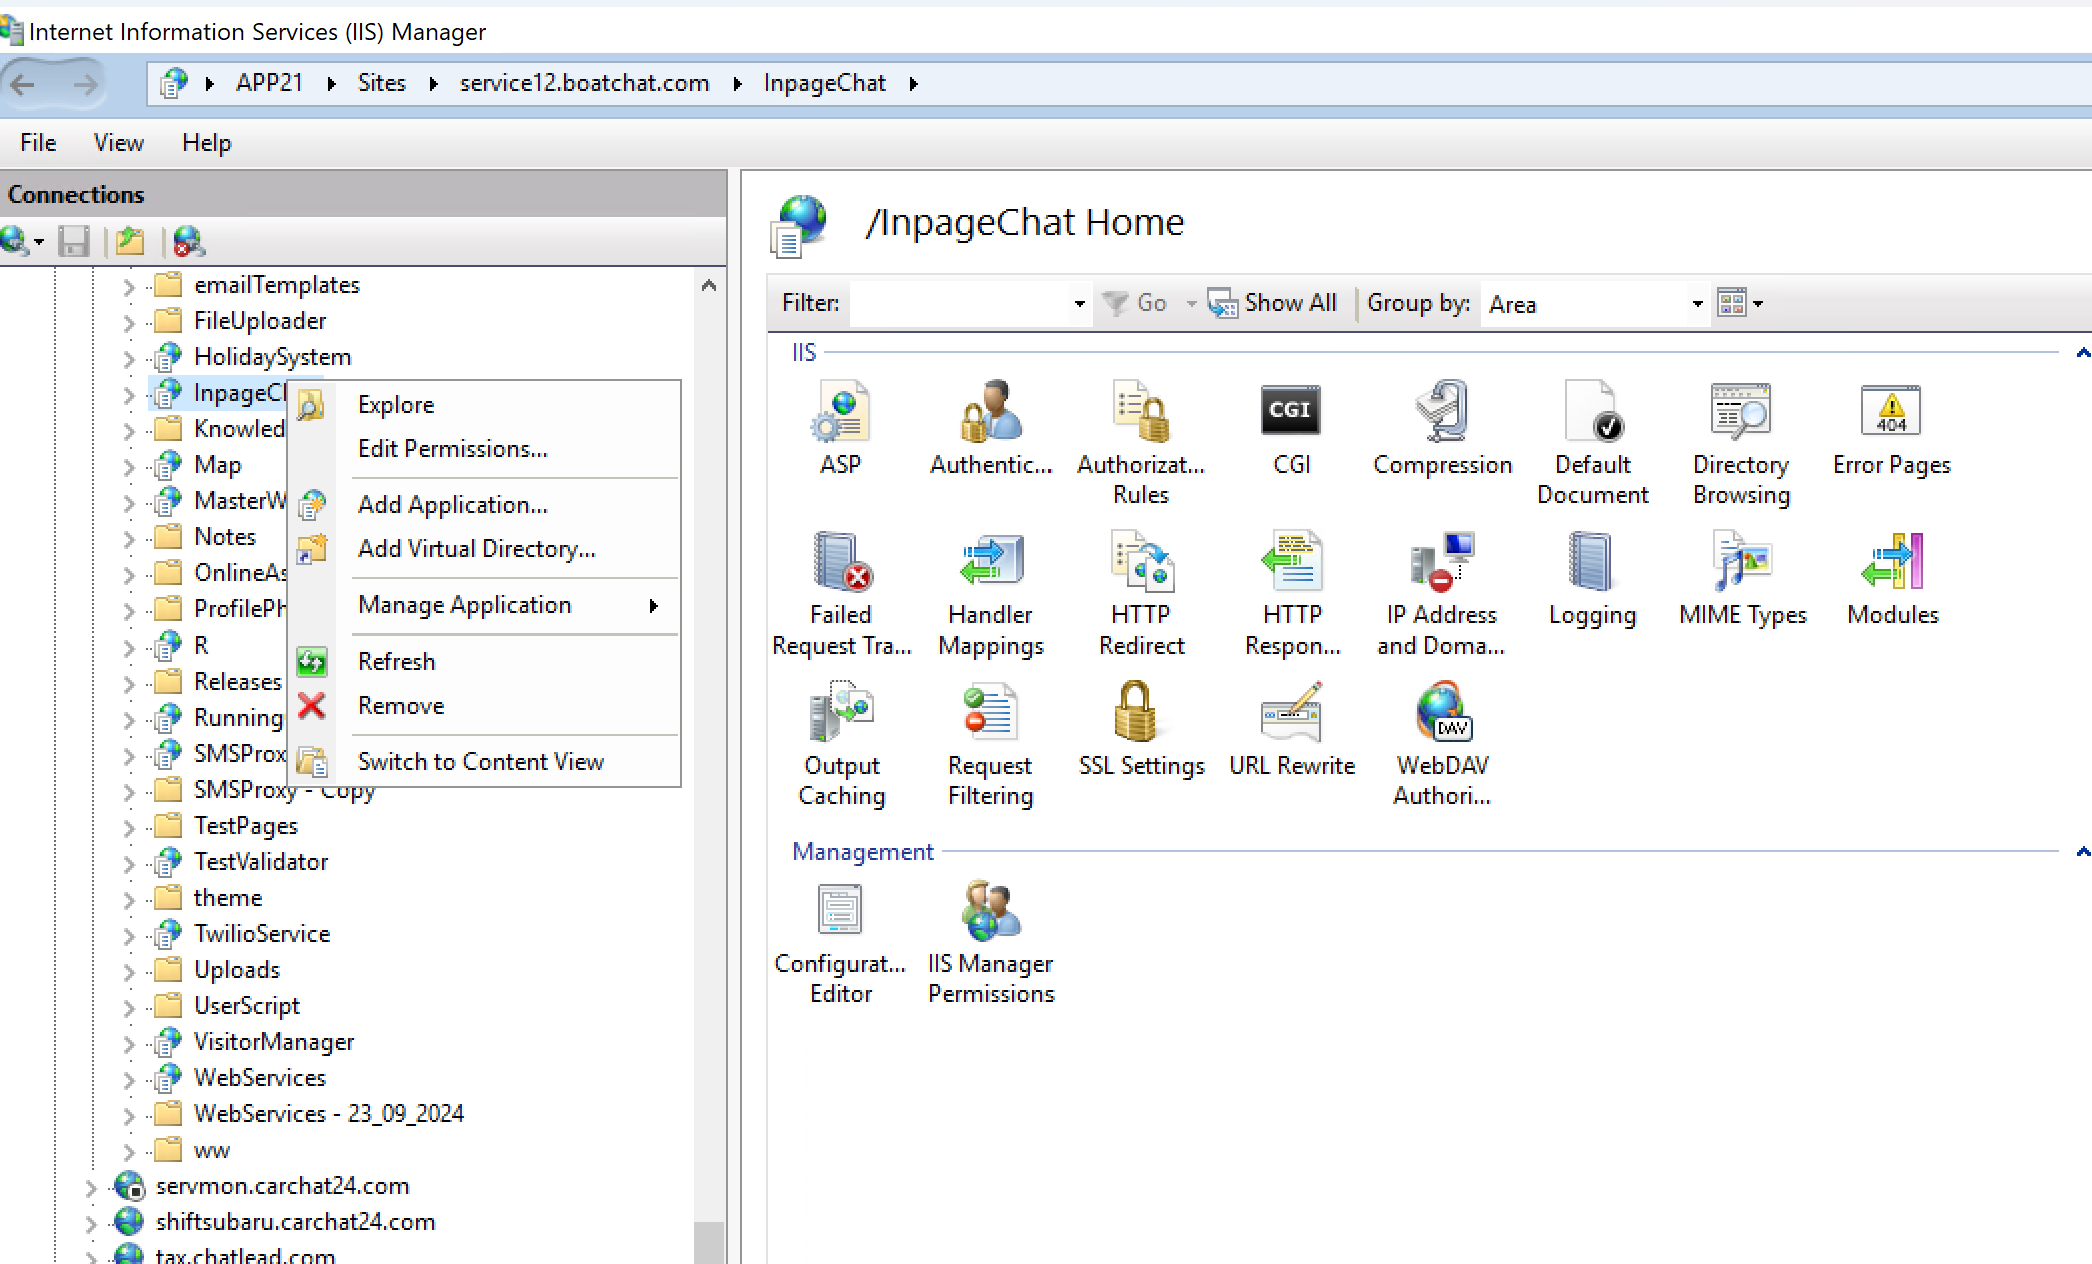
Click on that IIS (internet Information Service) icon on the taskbar.
. -
in that iis tab all the registered domain are there click on left side arrow in that service12.boatchat.com and the right click on that InpageChat folder and the click on explore.
 .
. -
Then select all files( please delete all the existing .zip files before selecting all file.) and then compress all the file to .zip file and name it backup_inpagechat.zip. and paste it on C:\Development\Backup\BoatChat\InPage Chat.
-
Create a folder with a current date. for an example if date is 13th november 2024 then it will be InpageChat_2024_11_14. and paste the backup.
-
and move back to that C:\Development\Runtime\BoatChat\Publish\Service\InpageChat(Inpagechat publish folder).
-
copy your local build zip file and paste it on that server's folder. and the keep only two zip files, web.config, NLog.config and delete other files(if some files are not deleted then keep the application pool stop/create a same name folder and rename and delete existing one.C:\Development\Runtime\BoatChat\Publish\Service ) after that unzip copied zip file and start application pool and your changes are live.
-
For Only Angular Deployment:
-
goto Development\VisitorChatAngular\InpageChat in your localdisk.
-
open in visual studio and build it.
npm run build -
goto wwwroot\app\dist\d3 and select all and zip it.
-
after that goto test server and open IIS and goto service12.boatchat.com and InpageChat folder.
-
then goto wwwroot\app\dist\d3 that folder and take rest of elements backup and upload it to that folder on server and unzip the zip
-
-
How to make Webconsole Local Publish
-
install ms build(most of the cases ms build pre-installed from visual studio 2022).
-
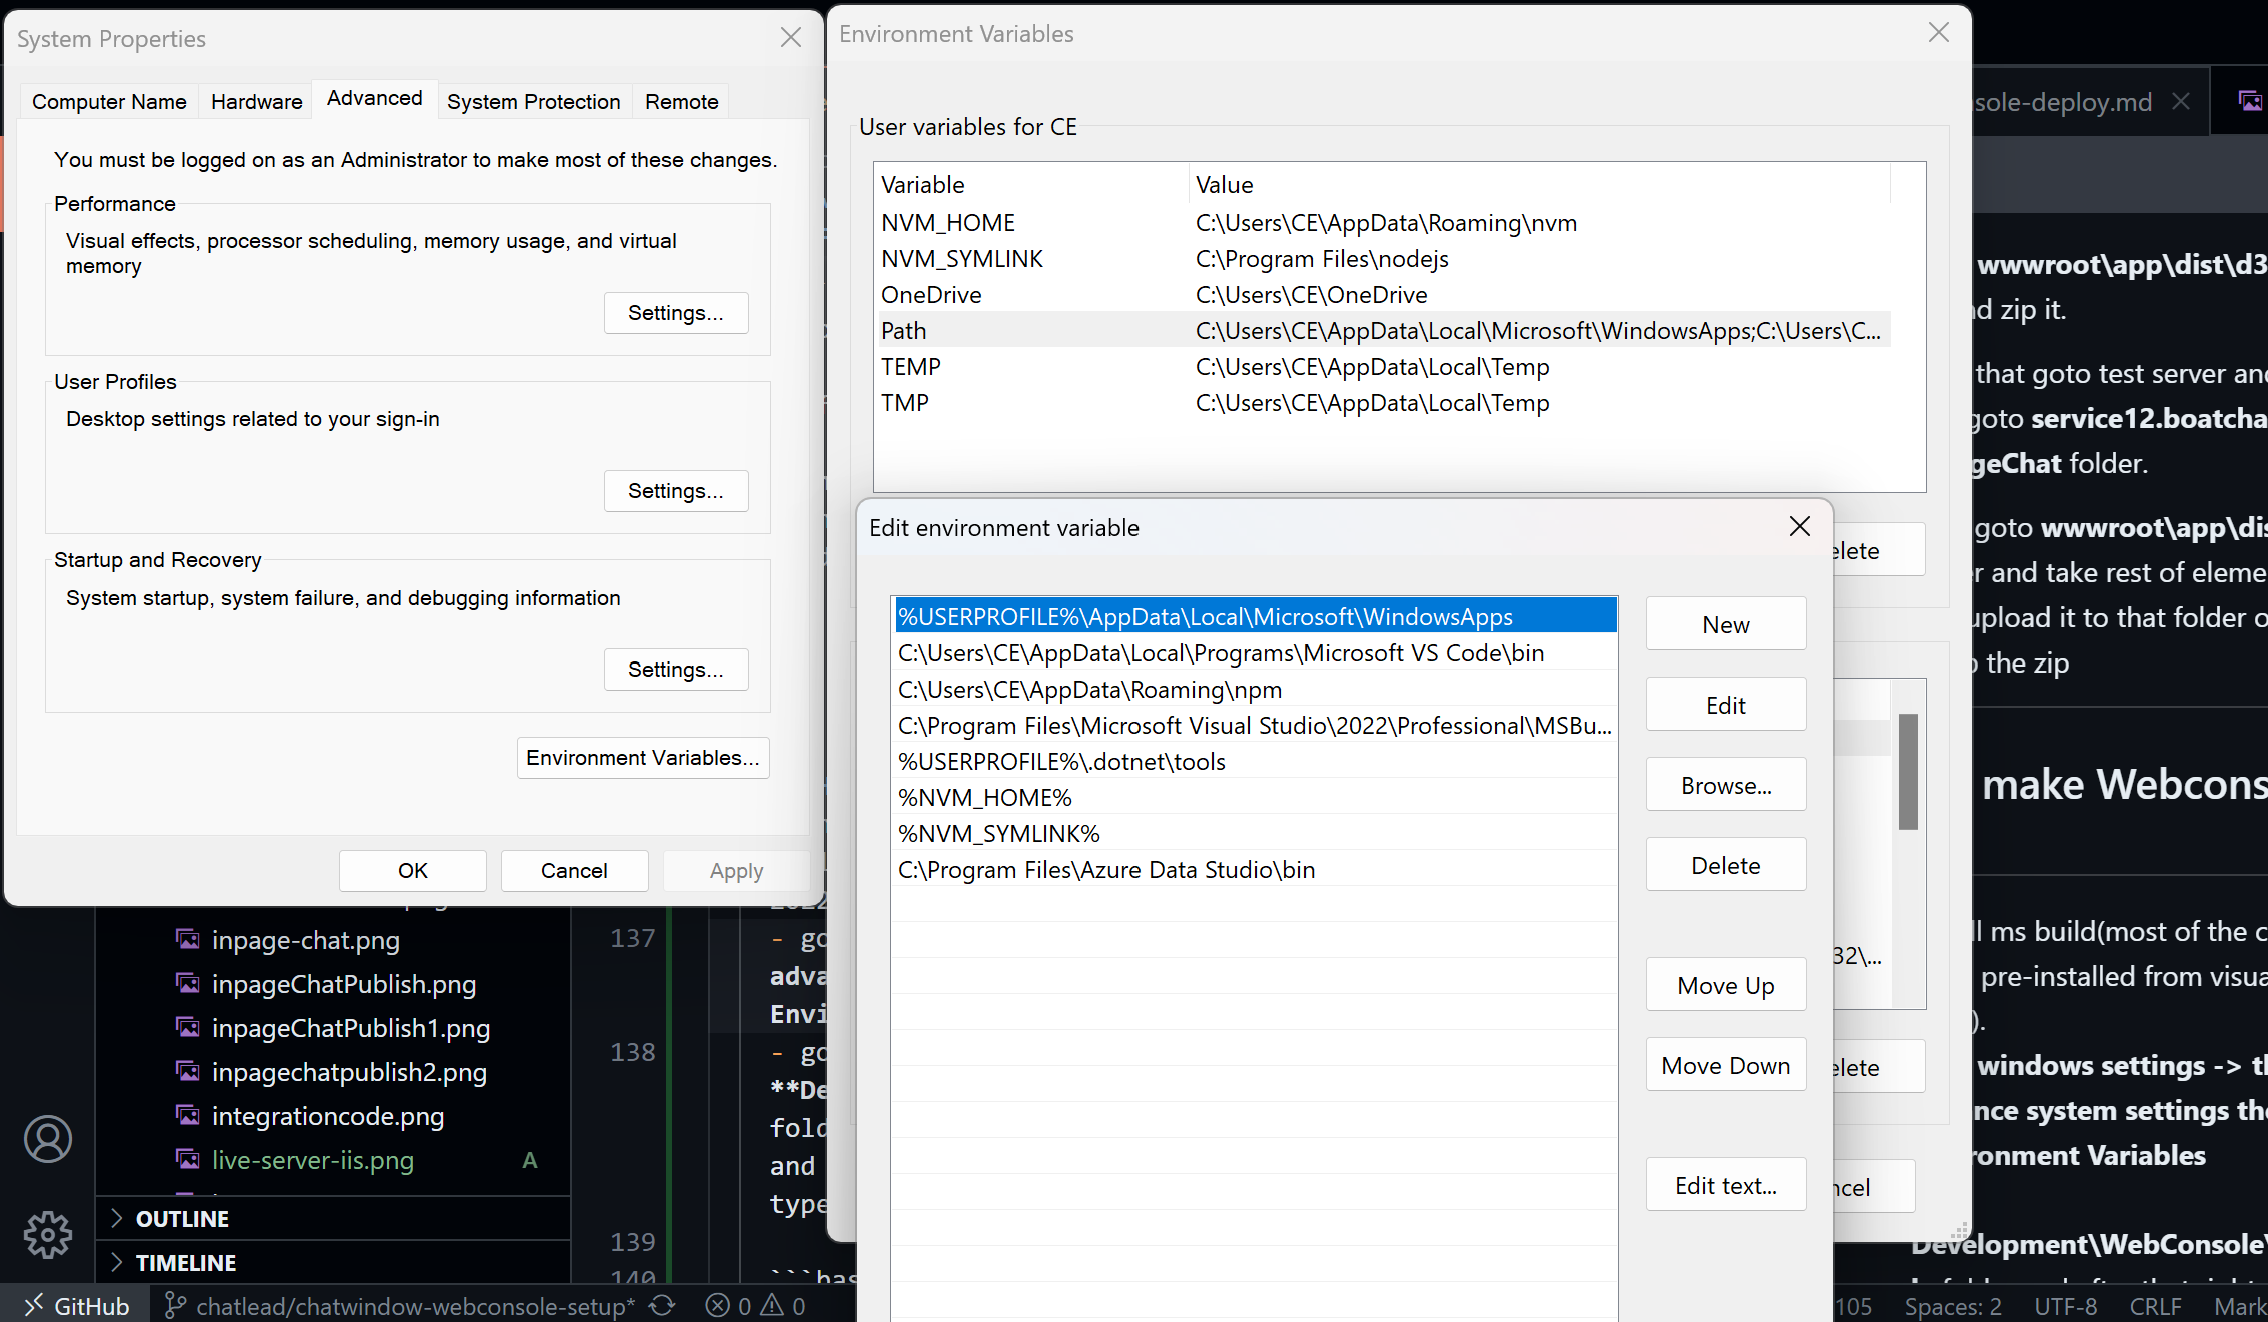
goto windows settings -> then goto advance system settings then click on Environment Variables
-
click on Path from user variable edit it and add Ms-Build path in case for me its C:\Program Files\Microsoft Visual Studio\2022\Professional\MSBuild\Current\Bin
-
goto Development\WebConsole\WebConsole folder and after that right click on that and click on Open in Terminal then type
-
PS C:\Development\WebConsole\WebConsole>./publish
# click on enter
C:\Development\WebConsole\WebConsole\build.xml
# Enter the config value for which product you want to publish.
Enter The config value:service11.carchat24.com
# click on enter
Enter 0 for DEBUG or 1 for RELEASE build:1
#click on enter and it will start building. -
This will trigger publish file and 1st angular build started. after that ms-build trigger and the whole app builds.
How to make Webconsole Publish from Azure pipeline
-
goto Azure Dev Portal.
-
goto WebConsole project and goto pipeline click on WebConsole and Run Pipeline
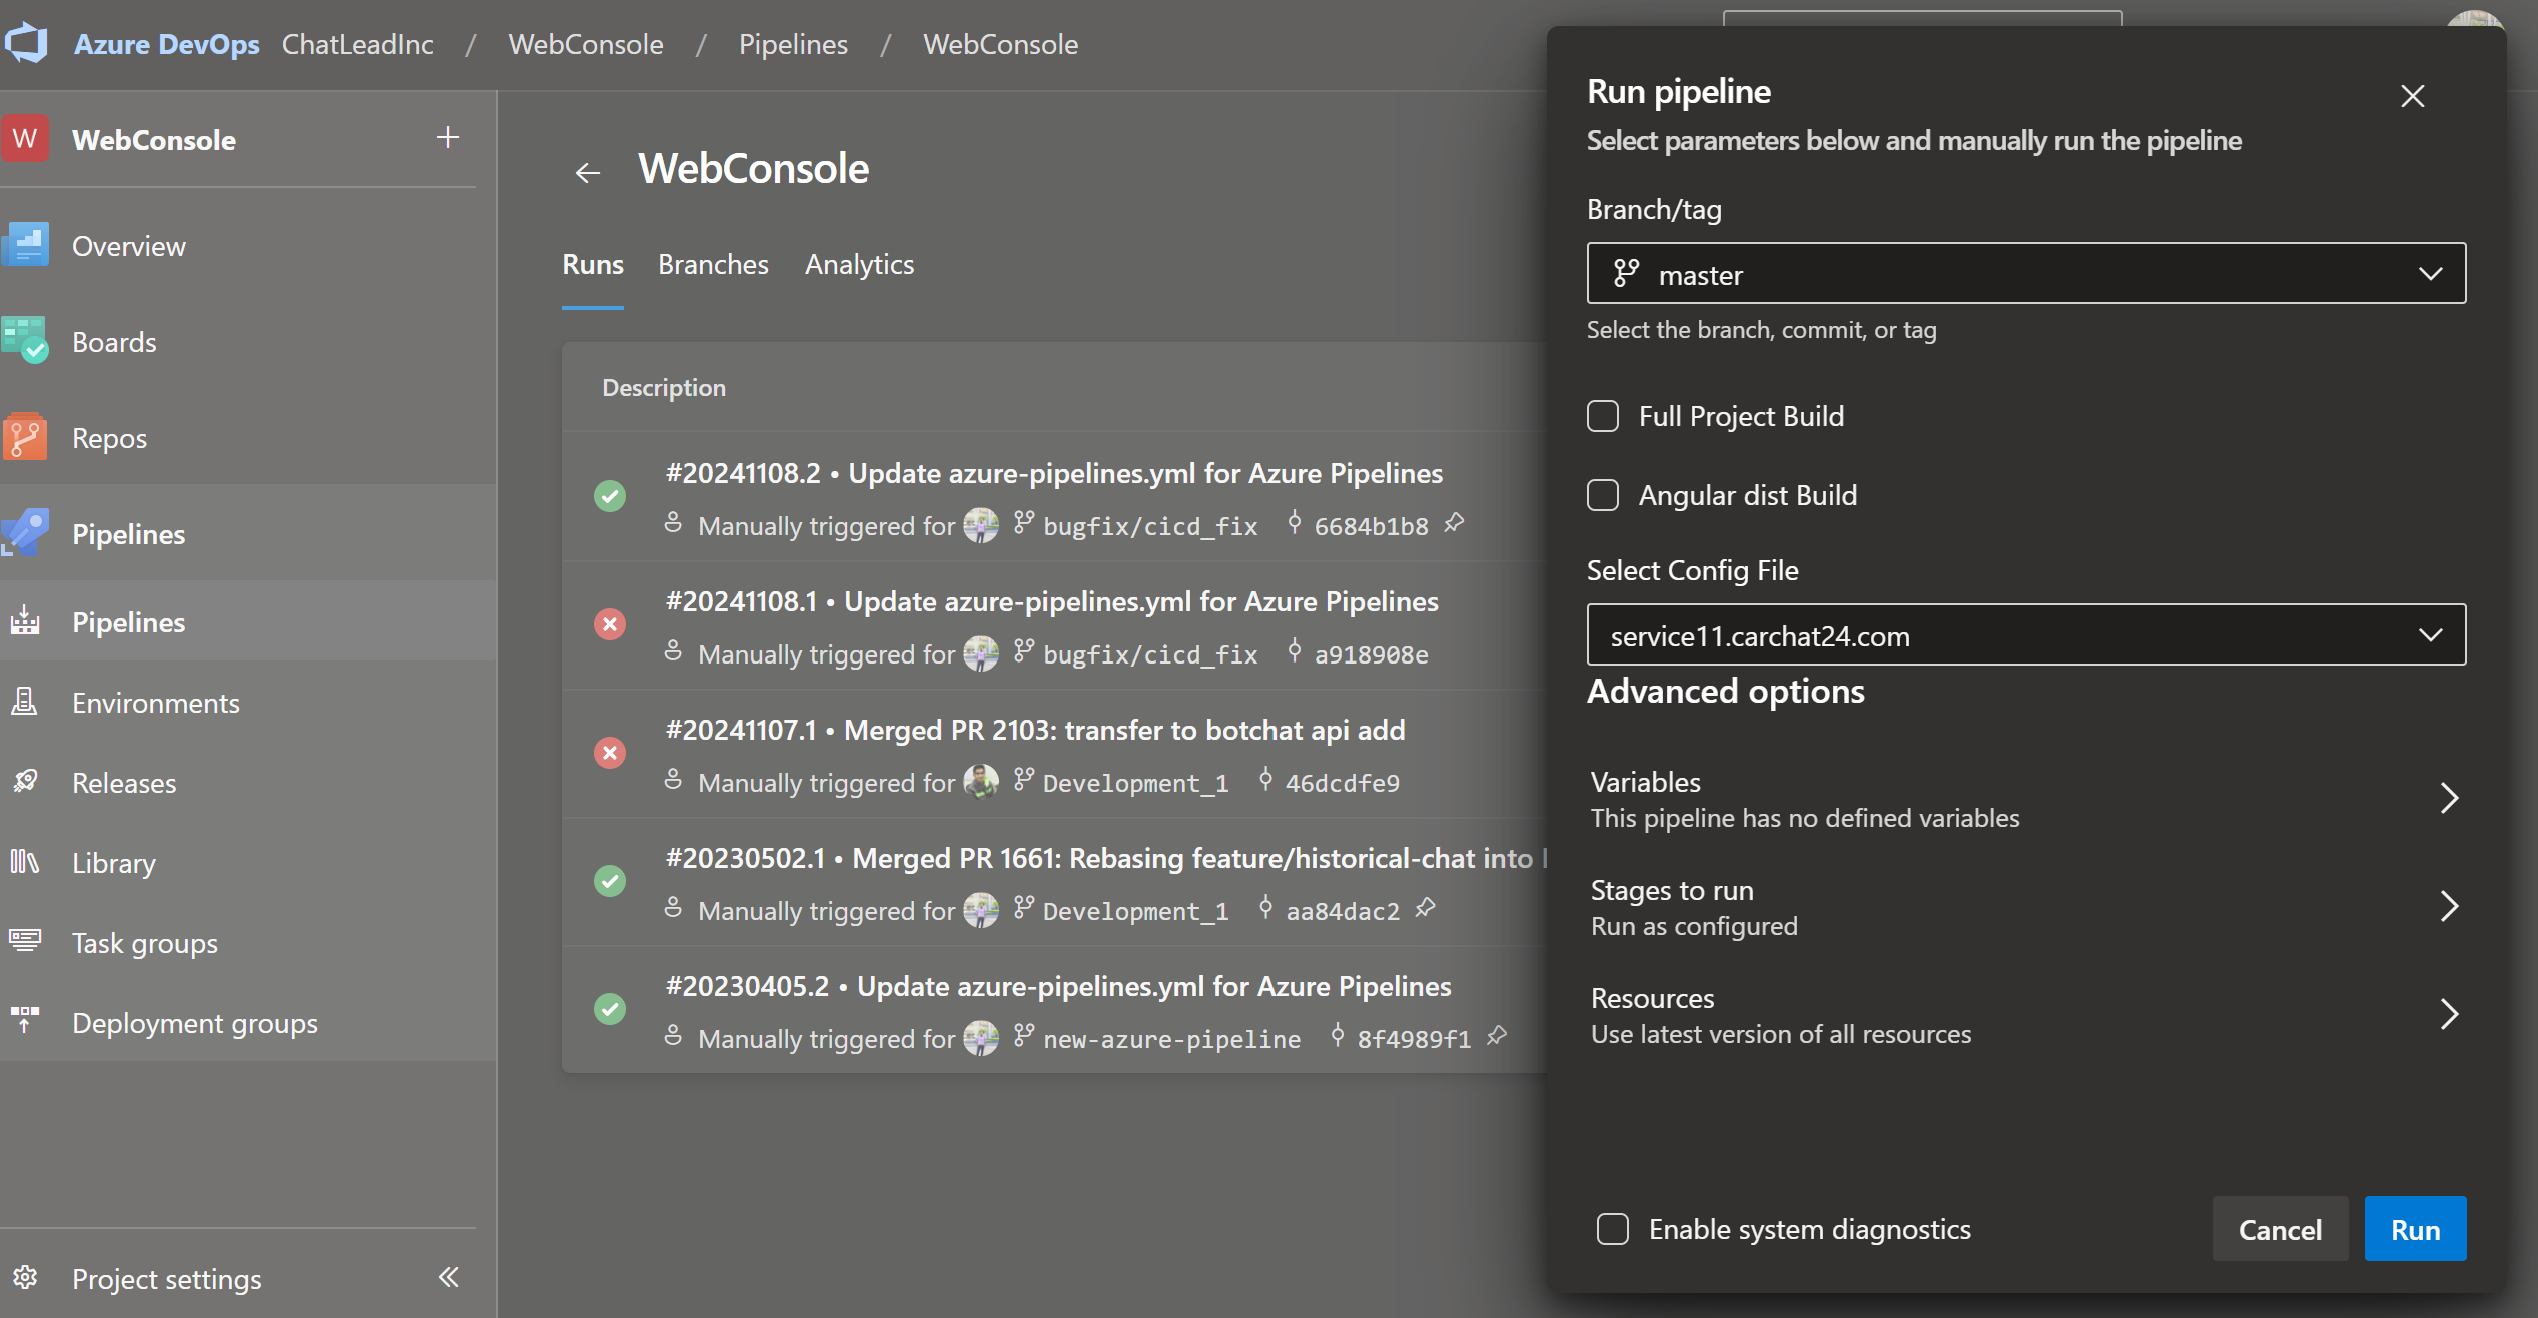 .click on run pipeline
 -
select branch which branch you want to build
-
Full Project Build - building full project angular then .net.
-
Angular Dist Build - building only angular code
-
select config file for which product you want to publish.
-
after running that artifact is generated download that zip upload it without web.config, NLog.config, firebase-messaging-sw.js file to dedicated server(live or test).
-
only test config's can be published to test server and live config's can be published to live.
-
Live Server Deployment of Webconsole
-
Now connect sophos and take to that specific server.
-
buld as per live product build as per need.
-
Click on that IIS (internet Information Service) icon on the taskbar.
-
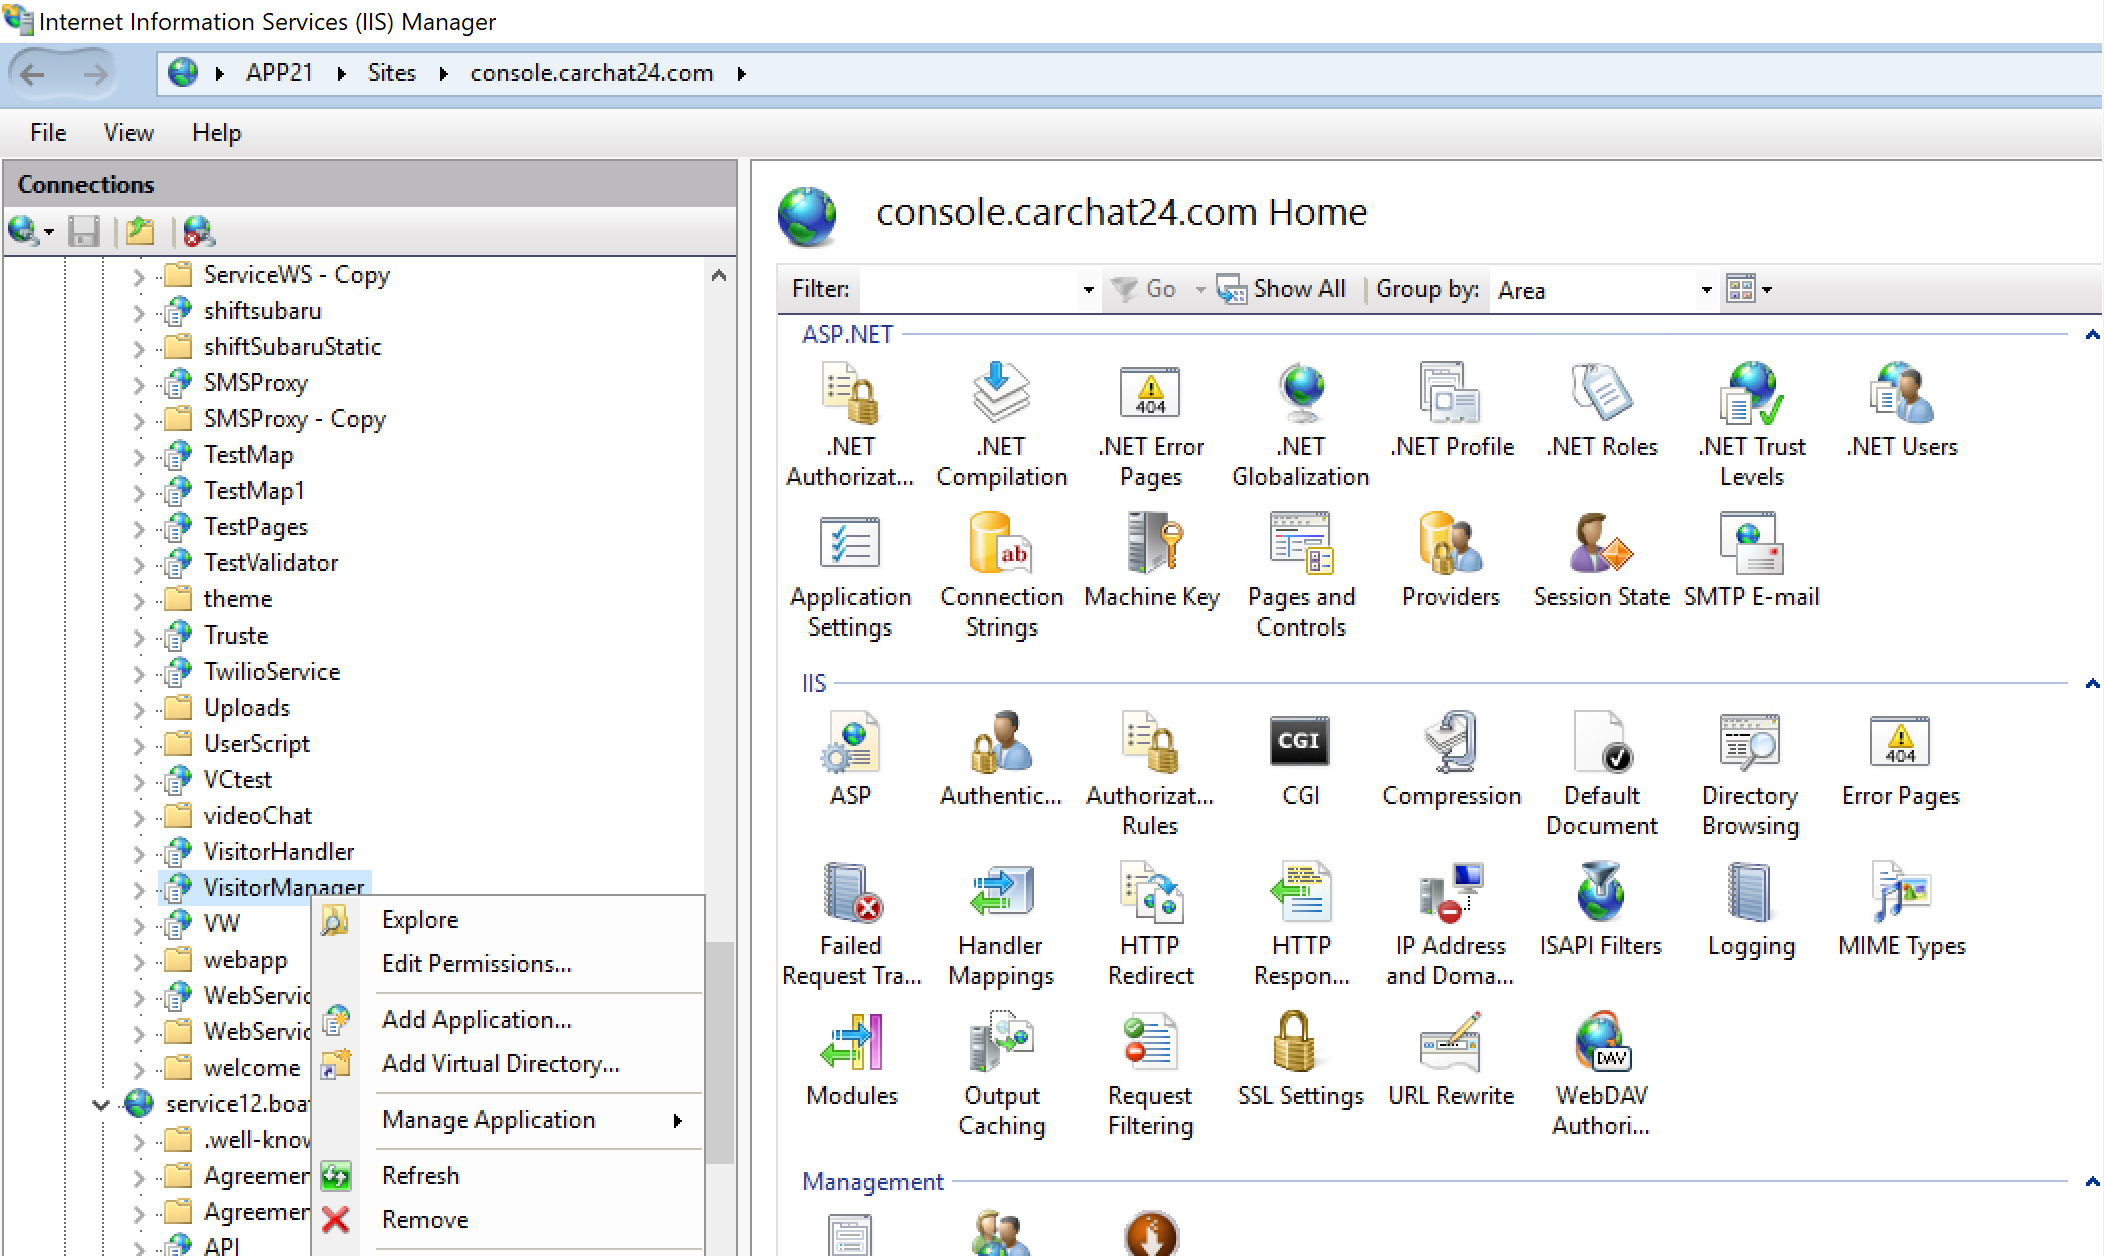
click on the console.carchat24.com and then explore take the backup of all files except existing zip.
-
goto C:\Development\Backup\Carchat\webConsole this path if you want to paste carchat backup.
-
after that create a folder Console_2024_11_14 and paste the zip into that.
-
then back to the C:\Development\Runtime\CarChat24\CarChat24_Console folder and paste the zip from your local machine to that server folder and unzip it after deleteing all files except web.config, NLog.config, firebase-messaging-sw.js. and unzip it.
-
For Only Angular Deployment:
- goto dist folder in live server. C:\Development\Runtime\CarChat24\CarChat24_Console\dist
- paste the angular dist zip and unzip it after deleteing all files.
-
-
Test Server Deployment of Webconsole
-
Now connect sophos and take to that specific server.
-
buld as per Test product build as per need.
-
Click on that IIS (internet Information Service) icon on the taskbar.
-
click on the service11.carchat24test.chatlead.com and then goto Console folder and explore & take the backup of all files except existing zip.
-
then back to the C:\Development\Runtime\Carchat24\Publish\Service\Console folder and paste the zip from your local machine to that server folder and unzip it after deleteing all files except web.config, NLog.config, firebase-messaging-sw.js. and unzip it.
-
For Only Angular Deployment:
- Goto Development\WebConsole\WebConsole & open in visual studio code and run that code.
npm run build - make a zip from Development\WebConsole\WebConsole\dist this folder by selecting all file.dist file generated after npm run build.
- goto dist folder in live server. C:\Development\Runtime\Carchat24\Publish\Service\Console\dist
- paste the angular dist zip and unzip it after deleteing all files.
- Goto Development\WebConsole\WebConsole & open in visual studio code and run that code.
-
Chat Icons Customizable:
- take db server by using rdc(Remote Desktop Connection).
- Database Tables:
-
For Subscriber
- Table names: tblCustomizableIconInviteSettings(all minimal icon information), tblCustomizableIconInviteSettingsDetails (all icon details information including css, js, html)
-
For master
- Db: cc24mastersvr_m
- Table name: tblCustomizableIconInviteTemplateSettings, tblCustomizableIconInviteTemplateSettingsDetails
-
Access db for query example for subscriber:
-
use [BoatChatSubscriber597d2404-ab25-473e-b24c-38192170210f_S]
![]() .
.
-
Html: Icon html appears here starts with html div "mainDivOnline_" for online. Html div "mainDivOffline_" for offline. Html div "mainDivCallback_*" for Callbackvalue
-
css: icon css
-
Js: Icon related javascript appears here.
-
DisplayBehaviour: here is the json which appears here.
 .
.
[{"uid":"1","controllerType":"COLOR_PICKER","imageType":null,"gradColor1":"","gradColor2":"","gradPosFrom":"left","gradPosTo":"","link":"","previewText":"Primary Background Color","propertyName":"background","value":"#ed0d1d","aspectratio":""},{"uid":"3","controllerType":"COLOR_PICKER","imageType":null,"gradColor1":"","gradColor2":"","gradPosFrom":"left","gradPosTo":"","link":"","previewText":"Close Tag Color","propertyName":"color","value":"#ffffff","aspectratio":""},{"uid":"4","controllerType":"COLOR_PICKER","imageType":null,"gradColor1":"","gradColor2":"","gradPosFrom":"left","gradPosTo":"","link":"","previewText":"Message Box Background Color","propertyName":"background","value":"#121212","aspectratio":""},{"css":"designergeneratedOnline","mainDivID":"designerOnline","type":"online"},{"css":"designergeneratedOnline","mainDivID":"designerOnline","type":"online"}]
Visitor Chat Deployment to Live(deprecated):
-
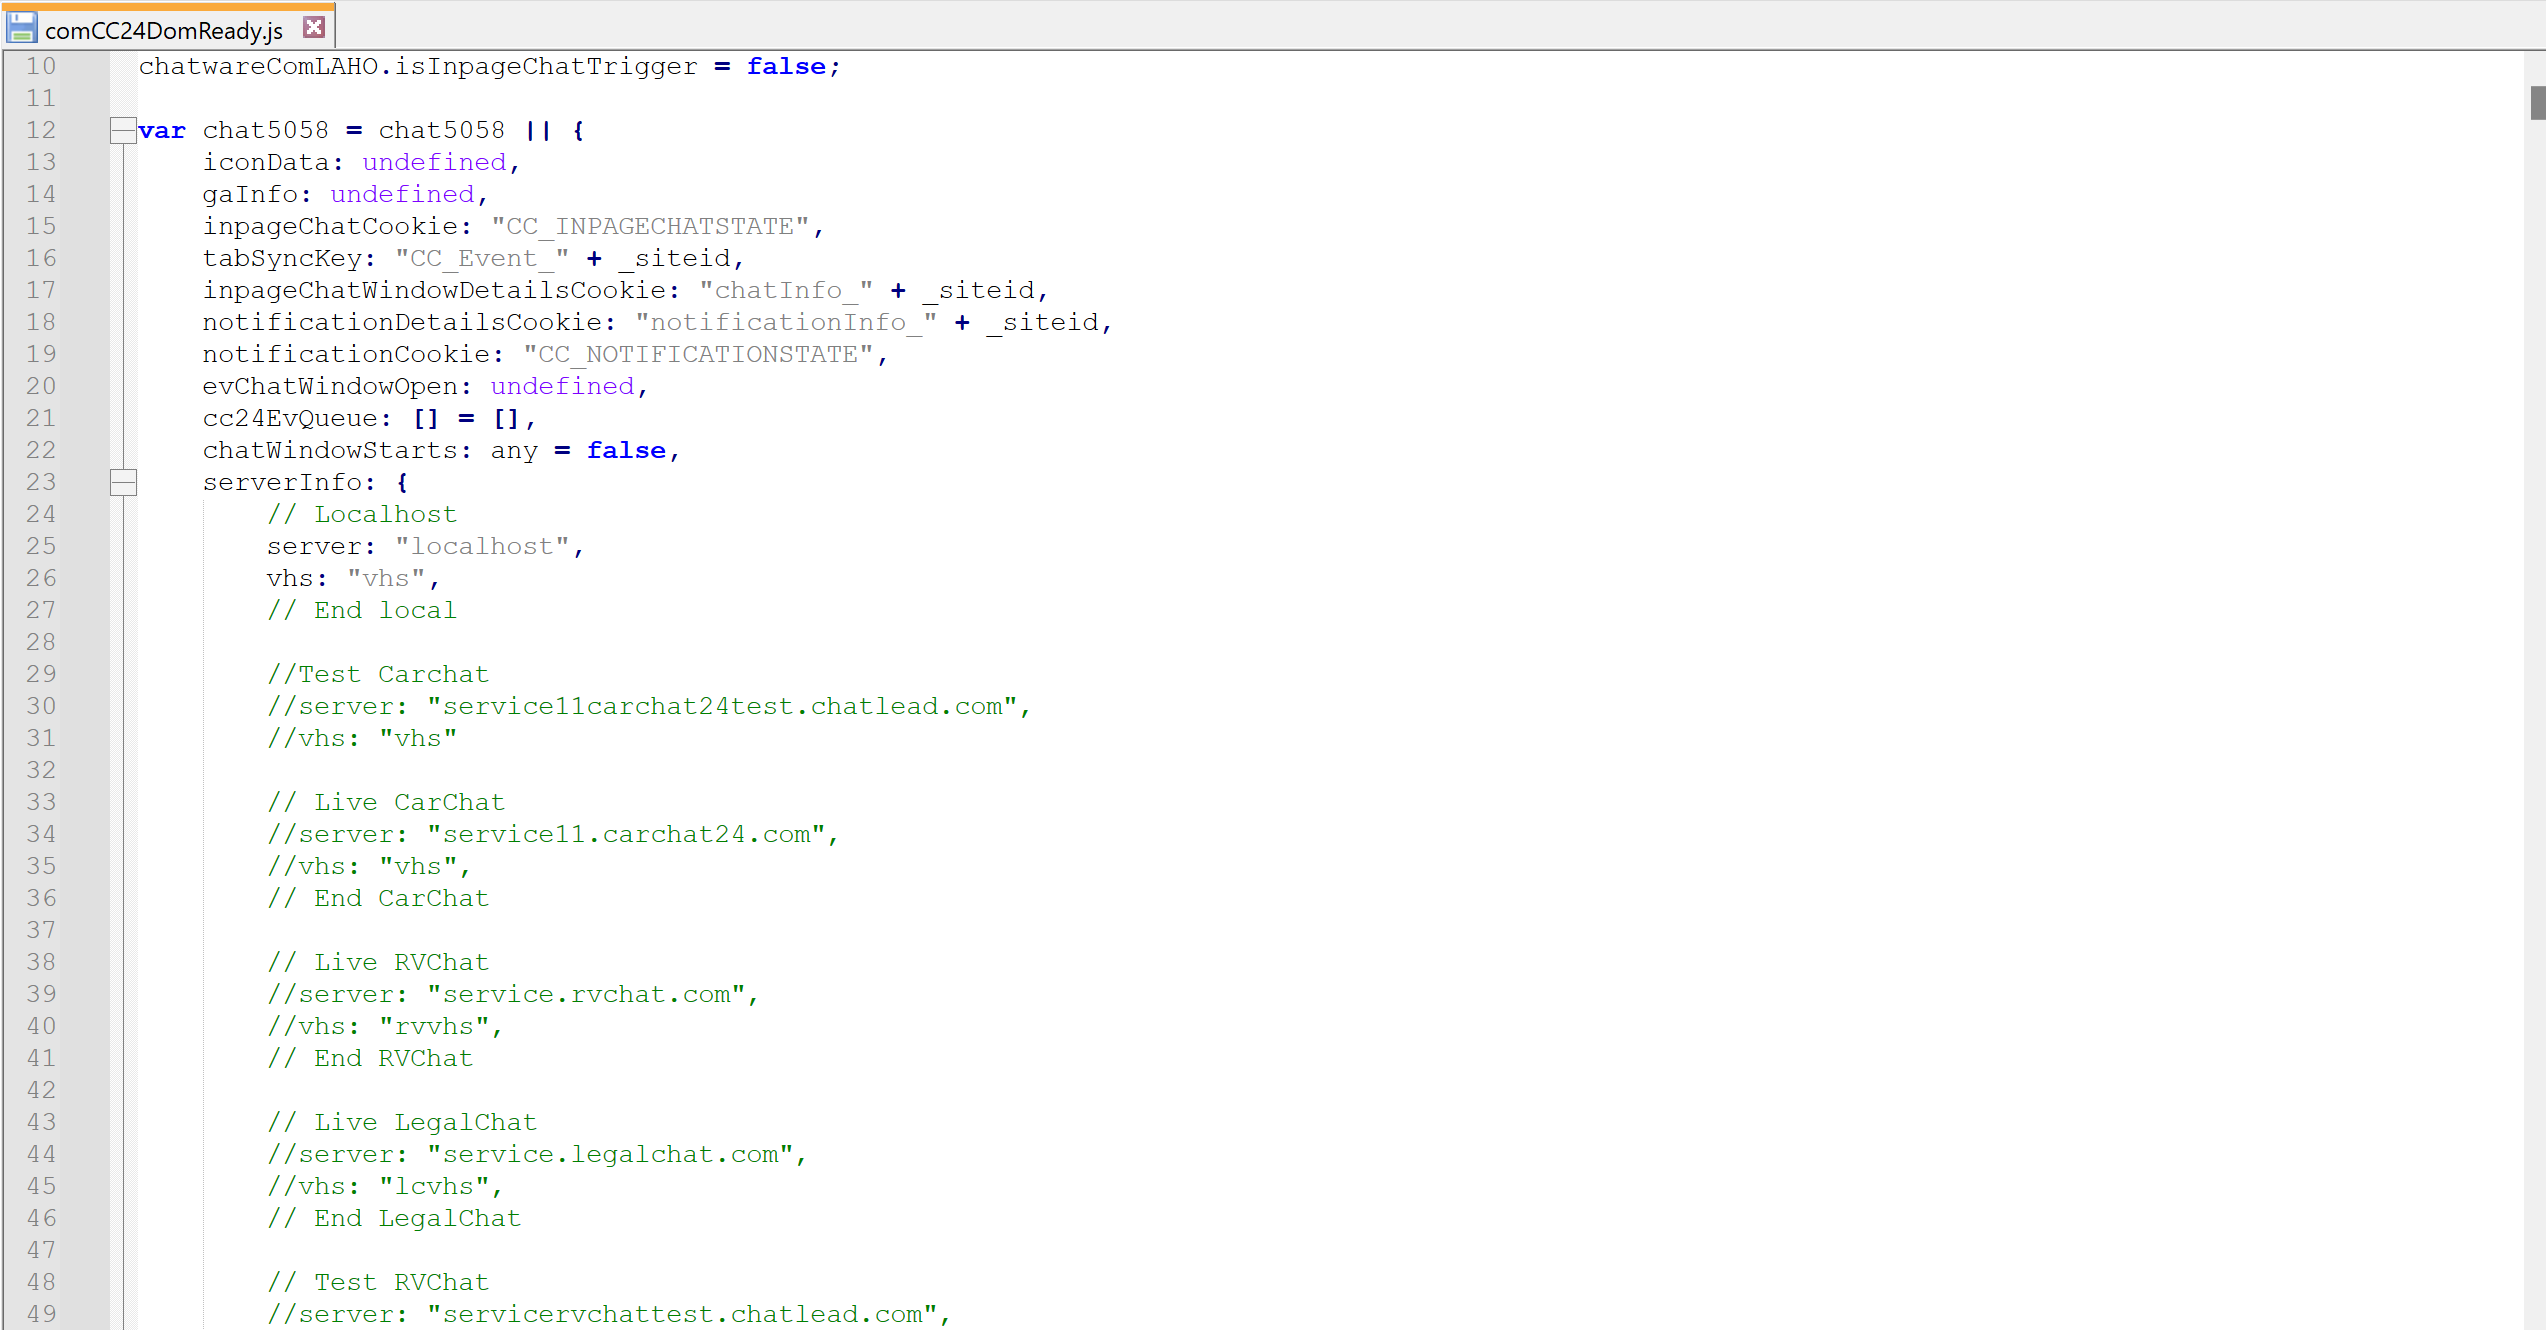
goto Development\VisitorChat\VisitorChat\Scripts this folder and copy the contents of comcc script. and in the top. change serverInfo to which product you want to publish just uncomments that server, and vhs property and comment everything else.
-
for an example for you want to publish carchat live then do that:
      serverInfo: {
        // Localhost
        //server: "localhost",
        //vhs: "vhs",
        // End local

        //Test Carchat
        //server: "service11carchat24test.chatlead.com",
        //vhs: "vhs"

        // Live CarChat
        server: "service11.carchat24.com",
        vhs: "vhs",
        // End CarChat

        // Live RVChat
        //server: "service.rvchat.com",
        //vhs: "rvvhs",
        // End RVChat

        // Live LegalChat
        //server: "service.legalchat.com",
        //vhs: "lcvhs",
        // End LegalChat

        // Test RVChat
        //server: "servicervchattest.chatlead.com",
        //vhs: "rvvhs",
        // End LegalChat

        // Test Legalchat
        //server: "servicelegalchattest.chatlead.com",
        //vhs: "lcvhs",
        // End LegalChat

        // Live ServicesPro
        //server: "service.servicespro.com",
        //vhs: "spvhs",
        // End ServicesPro

    },
after that search for javascript minifier.
and minify that code.
Remember boatchat script is different it′s chat5058.js. In that file serverinfo consists only two like one boatchat test and one is for boatchat live just change, it as per your requirement.
- after that connect sophos goto live or test server as per need.
- after that goto that specific domain and then goto visitormanager and then explore
 .
. - Take a full backup and paste it on that backup folder for that specific product.
- then goto that scripts folder and then upload it comcc24domready.js(carchat,boatchat,rvchat), chat5058.js(boatchat)